此網頁以記帳簿來作為主題
此篇將記錄使用Express框架、handlebars網頁模板、Mongoose操控MongoDB來建構一個透過route來達到CRUD網頁的過程
以 RESTful (Representational State Transfer) 來作為撰寫程式碼風格
會直接將該建立的資料夾直接建立,不會最後再來改寫路由。
day 1
初始化設定
開新專案資料夾
初始化git
1
$ git init
- 資料夾底下初始化npm檔案
1
$ npm init
- 安裝express工具包
1
$ npm install express
安裝express使用的handlebars工具包
1
$ npm install express-handlebars
未來安裝mongoose來控制MongoDB文件資料庫伺服器
1
$ npm install mongoose
安裝method-override,來改寫路由的POST可以修改成PUT(修改、更新),DELETE(刪除),來達到GET(取得、讀取),POST(新增),PUT(修改、更新),DELETE(刪除),CRUD路由語意化
1
$ npm install method-override
開一個js檔案來撰寫伺服器,命名為app.js
- 在目錄底下npm初始化的package.json檔案設定腳本,方便之後使用如果尚未安裝nodemon 請先安裝nodemon,未來在設計伺服器的時候,nodemon會自動抓取檔案是否有變更,有變更會自動重啟伺服器,就不需要一直手動重啟伺服器。
1
2
3
4
5"scripts": {
"test": "echo \"Error: no test specified\" && exit 1",
"start": "node app.js",
"dev": "nodemon app.js"
},
載入 packages 及設定
js載入express工具包,並設定好各項變數參數,並啟動伺服器
1
2
3
4
5
6
7
8
9
10
11
12
const express = require ('express')
const app = express()
const port = 3000
// 伺服器在收到跟目錄位置時,要回應什麼東西,目前先設定一段純文字
app.get('/', (req,res) => {
res.send('This is Express server.')
})
app.listen(port,() => {
console.log('Server is running on https://localhost:3000')
})這時可以先測試伺服器有無啟動
js載入handlebars工具包,並設定好各項變數參數
1
2
3
4
5
6
7
8
9
10
11
12
13
14
15
16
17
18
19
20
21
22
23
24
const express = require ('express')
const exphbs = require('express-handlebars')
const app = express()
const port = 3000
// 使用 app.engine(extname, callback) 的方法,來建立要使用的樣板引擎
// extname 是你要給這個引擎的名稱同時也要跟附檔名設定一樣,可以自己設定,第二個參數是要使用什麼引擎,並設定這個引擎的相關參數
// 這邊第二個參數就將載入好的handlebars作為參數,並設定handlebars內的defaultLayout: 以及extname:
// defaultLayout是用來設定我們要以哪個檔案名做為主要樣板
// extname是用來設定我們要識別的副檔名,預設為handlebars,太長了我們把它簡化改為.hbs,同時第一個參數名稱命名也得是hbs
app.engine('hbs', exphbs({ defaultLayout: 'main', extname: '.hbs' }))
// 這邊是設定express將要使用的顯示引擎設為hbs,這個名稱是根據上面設定的名稱而訂。
// engine的命名,副檔名的命名,以及使用的view engine,三者要一樣
app.set('view engine', 'hbs')
app.get('/', (req,res) => {
res.send('This is Express server.')
})
app.listen(port,() => {
console.log('Server is running on https://localhost:3000')
})根據Express和handlebars的規範建立正確的資料夾
在跟目錄底下開一個 views 資料夾(Express),views內再加一個子資料夾layouts(handlebars)。在layouts內建立一個 main.hbs 的檔案
在main.hbs 就可以寫入html的相關布局
1
2
3
4
5
6
7
8
9
10
11
12
13
<html lang="en">
<head>
<meta charset="UTF-8">
<meta name="viewport" content="width=device-width, initial-scale=1.0">
<meta http-equiv="X-UA-Compatible" content="ie=edge">
<title>Keep Accounts</title>
</head>
<body>
<!-- 這邊要寫入{{{body}}}是因為,樣板引擎會識別這個位置,並把其他部分的樣版內容放進來此處 -->
{{{ body }}}
</body>
</html>另外
{{{ }}}三個花括號代表帶入的內容要分辨html標籤,如果不要分辨html內容則是帶入{{ }}兩個花括號,也是作為其他if each之類的語法辨識使用在views裡建立首頁要顯示的內容,index.hbs,這些頁面就會被引入 main.hbs 的
{{{ body }}}部分,先在index內隨便寫些東西,等等要確定伺服器的啟動沒有問題。
目前設定好了 Express, Handlebars, 接著設定首頁的route
route建立及設定
先建立routes資料夾
根目錄下先開routes資料夾以及index.js,資料夾下建立子資料夾modules及home.js先設定index.js
載入此之路由home.js,並設定首頁'/'route到home.js,最後匯出router1
2
3
4
5
6
7
8
9// 基本設定
const express = require('express')
const router = express.Router()
const home = require('./home')
// 這邊使用 router.use 導向home資料夾
router.use('/',home)
module.export = router設定home.js的路由
1
2
3
4
5
6
7
8
9
10// 基本設定,一樣需要express及express的Router
const express = require('express')
const router = express.Router()
// 當router取得 '/' 請求,請回應 index 頁面給客戶端
router.get('/',(req,res) =>{
res.render('index')
})
//同樣需要export
module.export = router回到主程式app.js掛載此路由工具,先刪除
1
2
3
4app.get('/',(req,res) => {
res.send('')
})
再來設定Express要使用routes
1 | // 只需要設定routes目錄位置就可以了,會自己去尋找index.js檔案 |
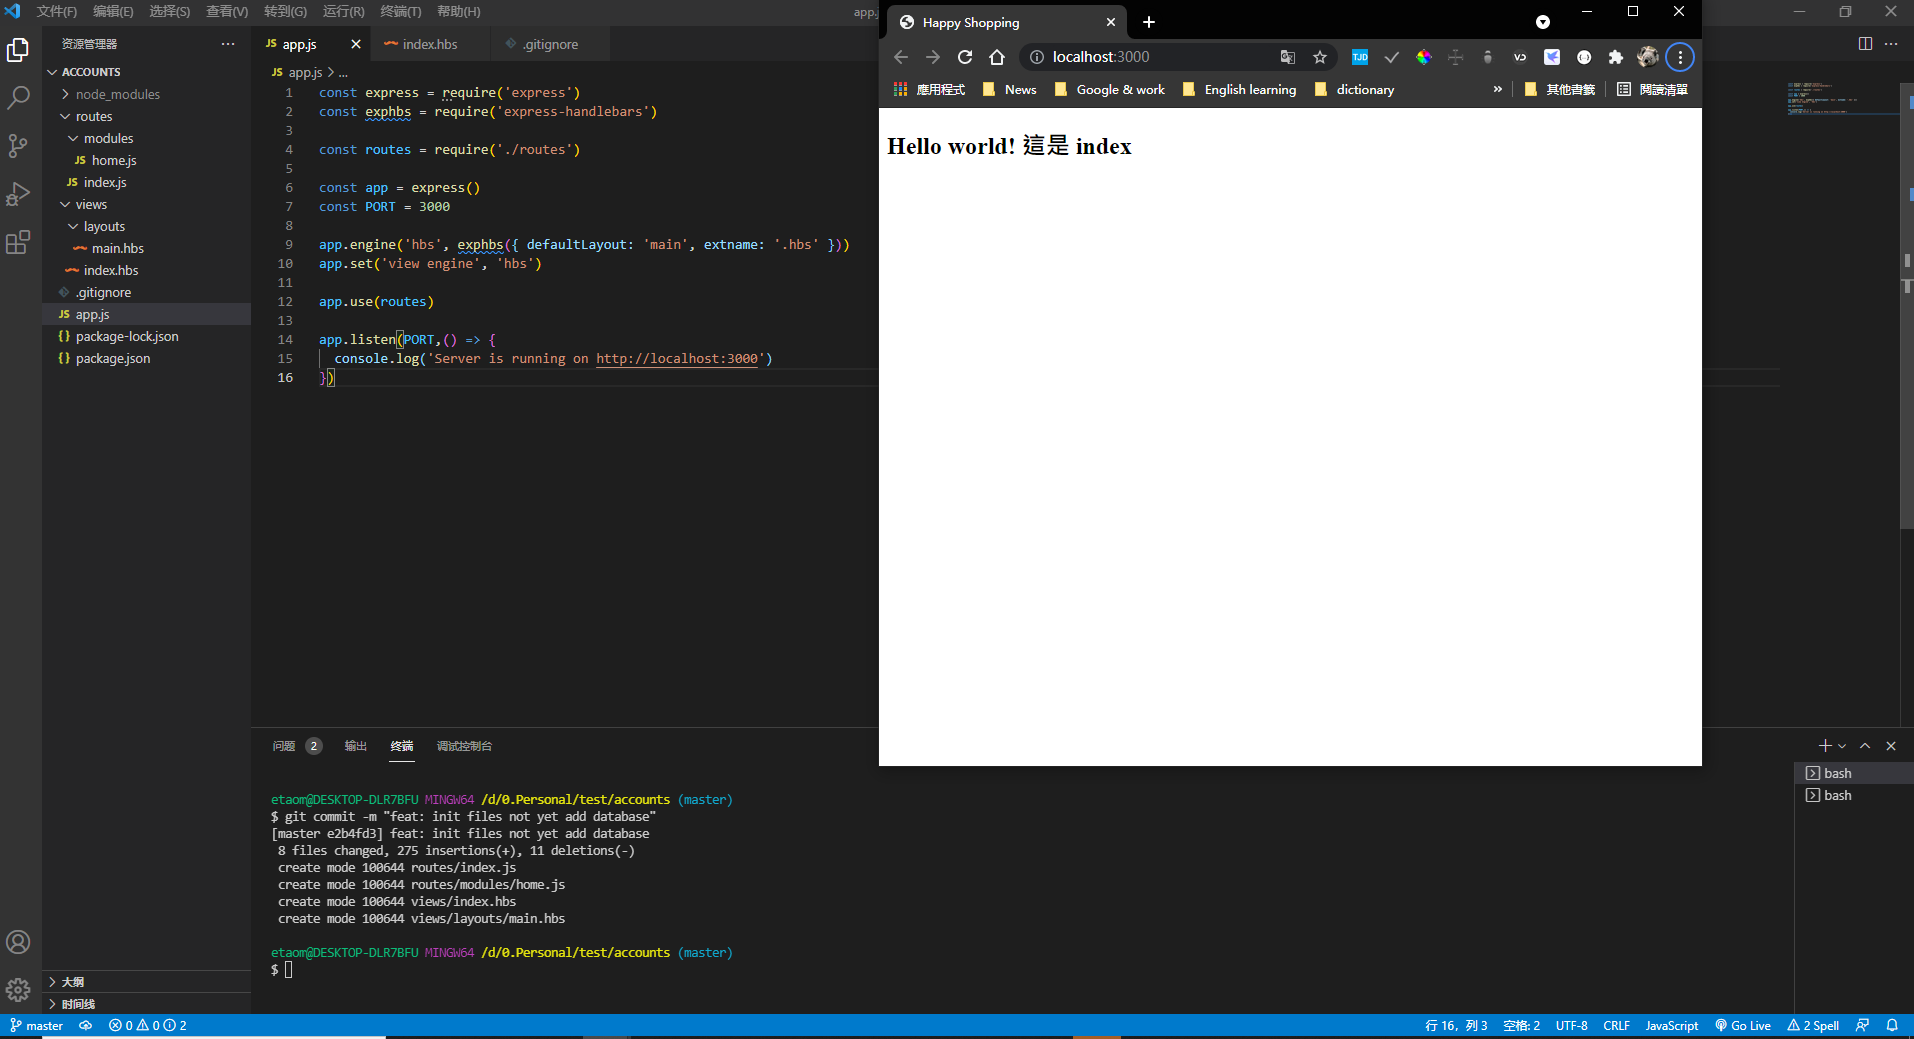
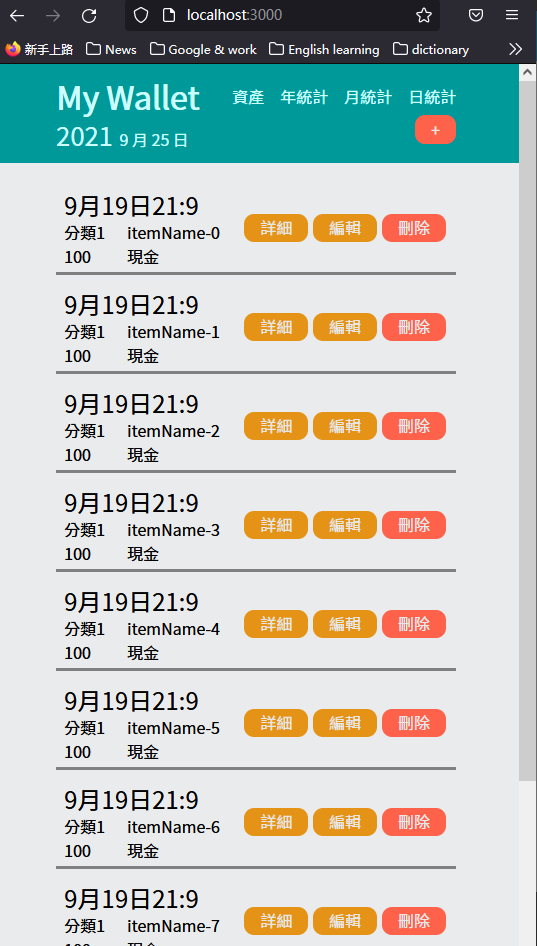
重新拜訪 http://localhost:3000 看看有沒有成功。
- 大致都設定完成後,終端機輸入npm run dev先來啟動伺服器看看成不成功
目前的資料夾以及成功畫面,並且git commit一下初始化吧! 記得.gitignore要忽略node_modules,不然會一大堆檔案。
連線 MongoDB 並建立種子資料
先在MongoDB開設專用database,命名為expenses
接著在根目錄開設config資料夾,要將設定相關的檔案都放在這
在資料夾內建立mongoose.js
先載入 mongoose,並用mongoose連線mongoDB1
2const mongoose = require('mongoose')
mongoose.connect('mongodb://localhost/expenses')連線mongoose連線mongodb後會取得一個連線狀態的資訊,我們需要設定一個參數,把連線狀態暫存下來,才能繼續使用。接著設定正常連線顯示時連線成功以及錯誤時顯示連線錯誤,最後將它匯出。
1
2
3
4
5
6
7
8
9
10
11
12const db = mongoose.connection
// 連線異常
db.on('error', () => {
console.log('mongodb error!')
})
// 連線成功
// 連線成功只會發生一次,所以這裡特地使用 once,由 once 設定的監聽器是一次性的,一旦連線成功,在執行 callback 以後就會解除監聽器。
db.once('open', () => {
console.log('mongodb connected!')
})
module.export = db回到根目錄建立models資料夾,來完成MVC(models views control)軟體設計模式,並建立expenses.js
先載入mongoose,再來設定Schema(資料型態結構)1
2
3
4
5
6
7
8
9
10
11
12
13
14
15
16
17
18
19
20
21
22
23
24
25
26
27
28
29
30
31
32
33
34
35
36
37
38
39
40
41
42
43
44
45
46
47
48const mongoose = require('mongoose')
const Schema = mongoose.Schema
const expenseSchema = new Schema({
category_1: {
type: String,
required: true,
},
category_2: {
type: String,
required: true,
},
itemName: {
type: String,
required: true,
},
cost: {
type: Number,
required: true,
},
method: {
type: String,
required: true,
},
time: {
year: {
type: Number,
required: true,
},
month: {
type: Number,
required: true,
},
date: {
type: Number,
required: true,
},
hour: {
type: Number,
required: true,
},
minute: {
type: Number,
required: true,
},
}
})
module.exports = mongoose.model('Expenses', expenseSchema)接著在models目錄下創建seeds資料夾,並建立expensesSeeder.js,之後可以用來創建基本的種子資料來做測試。
先引入剛剛設定好的expenses.js1
2
3
4
5
6
7
8
9
10
11
12
13
14
15
16
17
18
19
20const Expenses = require('../expenses')
const db = require('../../config/mongoose')
db.once('open',() =>{
Expenses.create({
category_1: '分類1',
category_2: '分類2',
itemName: `itemName-` + i,
cost: 100,
method: '現金',
time: {
year: 2021,
month: 9,
date: 19,
hour: 21,
minute: 9,
}
})
console.log('Created seeds done.')
})之後再package.json裡設定腳本,方便以後執行創建種子測試
1
2
3"scripts": {
"seeds": "node models/seeds/expensesSeeder.js"
},
現在可以使用專端機測試執行種子腳本看有沒有成功,並在資料庫檢查是否有成功生成種子資料
1 | $ npm run seeds |
回到app.js 引入mongoose.js
1
require('./config/mongoose') // 直接加入
接著嘗試將資料引入畫面中,這時我們需要回到路由home.js設定
1
2
3
4
5
6
7
8
9
10
11
12
13
14
15
16
17
18const express = require('express')
const router = express.Router()
const Expenses = require('../../models/expenses') // 增加這段
router.get('/', (req, res) => {
Expenses.find() // 搜尋資料,若不加入條件,則返回全部資料
.lean() // 撈完資料要用lean,因為不允許直接使用原型物件,要將原型物件先做處理將它變成單純的物件
// sort為排序指令,可以帶入要以什麼作為排序,這邊使用mongodb創建時會產生的_id來作為排序資料
// 這個id是會按照"正常的時間"先後順序排列的,asc(ascending)正序 desc(descending)反序。
.sort( {_id: 'asc'} )
.then(items => {
// 將資料全部送到index內來使用
res.render('index', { items })
})
.catch(error => console.log(error))
})
module.exports = router將資料帶進index.hbs
先建立些草稿HTML結構後,回到routes > modules > home.js,重新設定路由1
2
3
4
5
6
7
8
9
10
11
12
13
14
15
16const express = require('express')
const router = express.Router()
// 新增
const Expenses = require('../../models/expense')
// 路由需引入Expenses資料庫資料
router.get('/', (req,res) => {
// 這邊使用find來取得資料,後面沒有加入條件則是取得全部資料
Expenses.find()
.lean() // handlebars不能直接使用原型物件,所以要先使用mongoose的lean()將資料轉為純物件
// 將取得的資料帶入index
.then(expenseItems => res.render('index', {expenseItems}))
.catch(error => console.log(error))
})
module.exports = router此階段的完成狀態
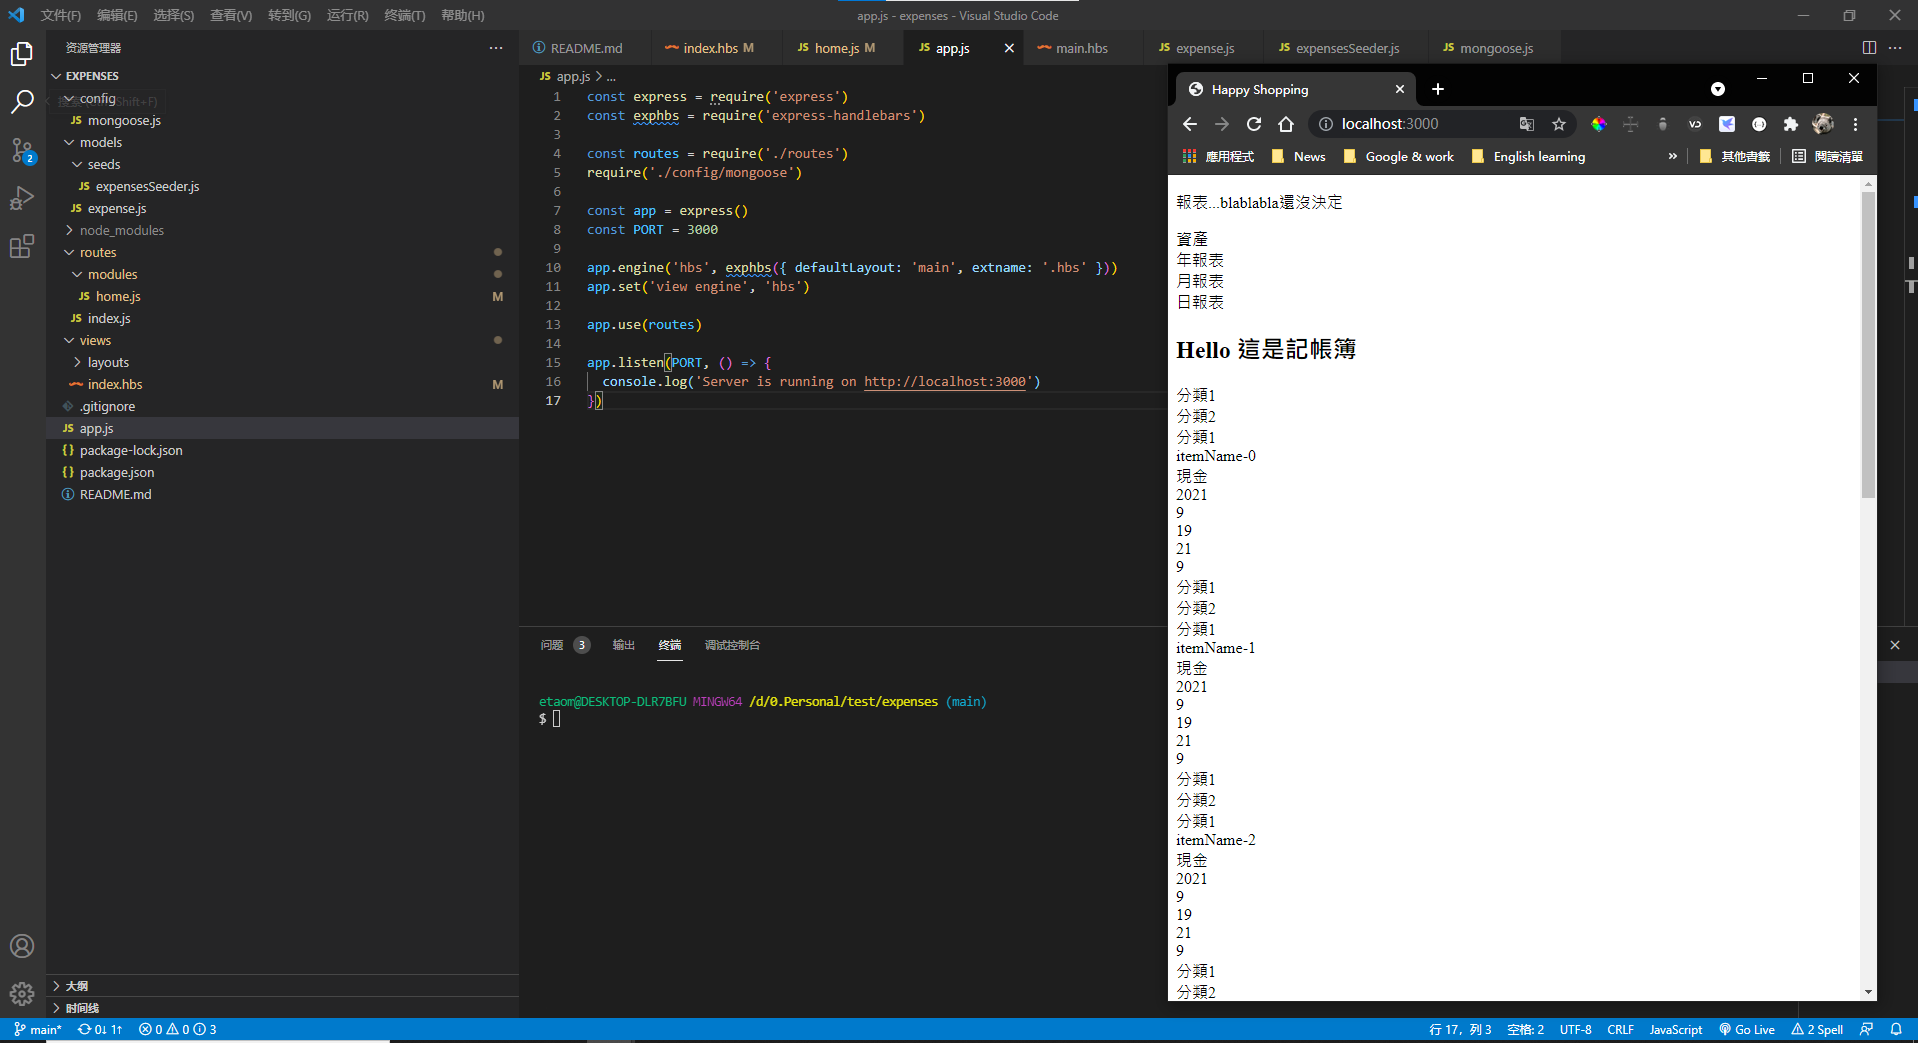
Day 1 結束
day 2
這幾天工作忙碌,沒辦法全心全力投入製作,但做多少算多少吧! 慢慢刻!
從上次將資料從文件資料庫引入後,打算先來刻一些簡單的版面。
設定靜態檔案資料夾
- 先根目錄開設Public資料夾來放置要使用的JavaScript及styleSheet檔案,然後接著在app.js內設定靜態檔案的資料夾名稱
1
app.use(express.static('public'))
初始化CSS
- 開style.css開始初始化設定CSS,
1
2
3
4
5
6
7
8
9
10
11
12
13
14
15
16
17
18
19
20
21
22
23
24
25
26
27
28
29
30
31
32
33
34
35
36
37
38
39
40
41
42
43
44
45
46
47/* http://meyerweb.com/eric/tools/css/reset/
v2.0 | 20110126
License: none (public domain)
*/
html, body, div, span, applet, object, iframe,
h1, h2, h3, h4, h5, h6, p, blockquote, pre,
a, abbr, acronym, address, big, cite, code,
del, dfn, em, img, ins, kbd, q, s, samp,
small, strike, strong, sub, sup, tt, var,
b, u, i, center,
dl, dt, dd, ol, ul, li,
fieldset, form, label, legend,
table, caption, tbody, tfoot, thead, tr, th, td,
article, aside, canvas, details, embed,
figure, figcaption, footer, header, hgroup,
menu, nav, output, ruby, section, summary,
time, mark, audio, video {
margin: 0;
padding: 0;
border: 0;
font-size: 100%;
font: inherit;
vertical-align: baseline;
}
/* HTML5 display-role reset for older browsers */
article, aside, details, figcaption, figure,
footer, header, hgroup, menu, nav, section {
display: block;
}
body {
line-height: 1;
}
ol, ul {
list-style: none;
}
blockquote, q {
quotes: none;
}
blockquote:before, blockquote:after,
q:before, q:after {
content: '';
content: none;
}
table {
border-collapse: collapse;
border-spacing: 0;
}
載入字體
將字體載入CSS
將字體檔案放置到stylesheet檔案夾下,另開一個font資料夾,將中文字體檔案丟入,
設定中文字體,依不同副檔名會輸入不同format。1
2
3
4
5@font-face {
font-family: 'NotoSansTC';
src: url("./fonts/Noto_Sans_TC/NotoSansTC-Regular.otf") format('opentype');
font-style: normal;
}然後記得在main樣板head內載入CSS。
開始切版,先製作導覽列以後希望增加功能的按鈕,未來可以用來切換頁面,我們將內容寫在main.hbs內
切版記得要以mobile first,行動優先。
header下方使用javascript帶入當日日期,不管查詢或創建資料任何頁面,都將日期顯示在此處。
main.hbs,body後載入js1
2
3
4
5
6const year = document.querySelector('.year')
const monthDate = document.querySelector('.month-date')
let date = new Date()
year.innerText = date.getFullYear()
monthDate.innerText = `${date.getMonth() + 1} 月 ${date.getDate()} 日`當創建一個日期後,會得到一個毫秒,是從1970年1月1日起經過的毫秒數,
對創建的新日期使用:
- getFullYear,會得到年
- getMonth,會返還0~11數字
- getdate, 會返還1~31數字
階段完成圖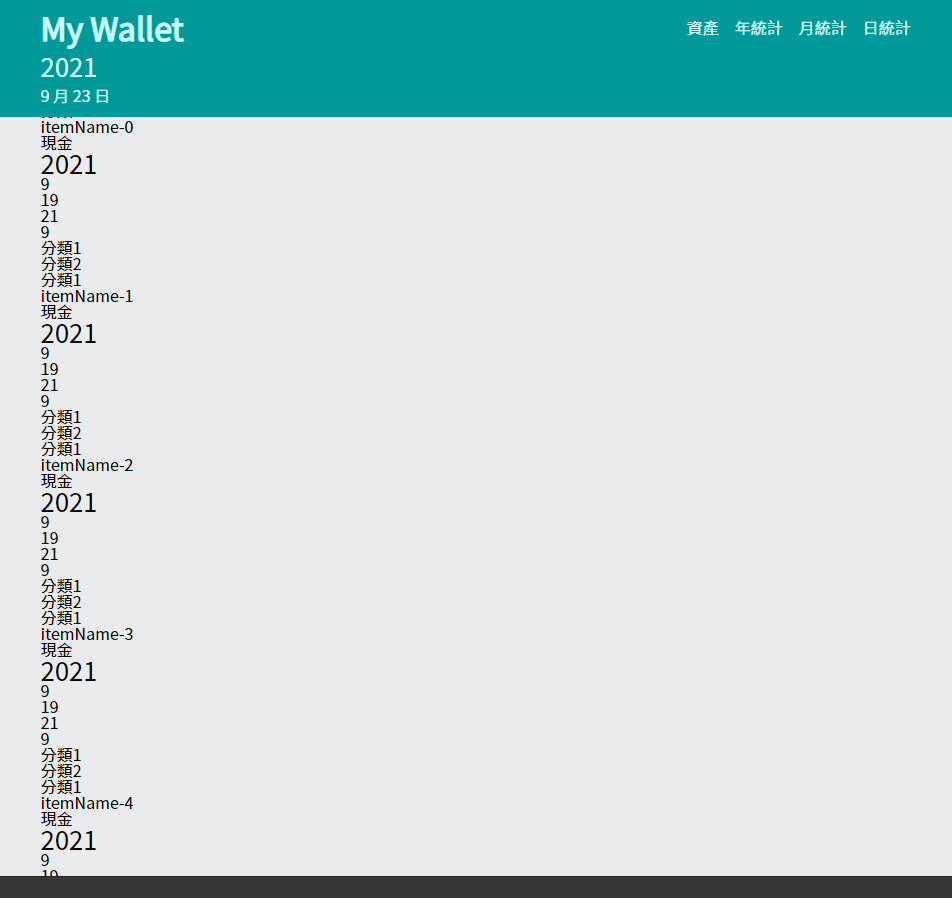
第二日記錄:
最近工作好忙,沒多少時間可以專心刻網頁,加上還有alpha camp的課程進度,進度稍微緩慢,反正沒人催,慢慢一步一步把網頁刻出來就對了
新學習項目:
- 如何載入文字檔案 @font-face {}
- 日期操作 new date()
day 2 結束
day 3
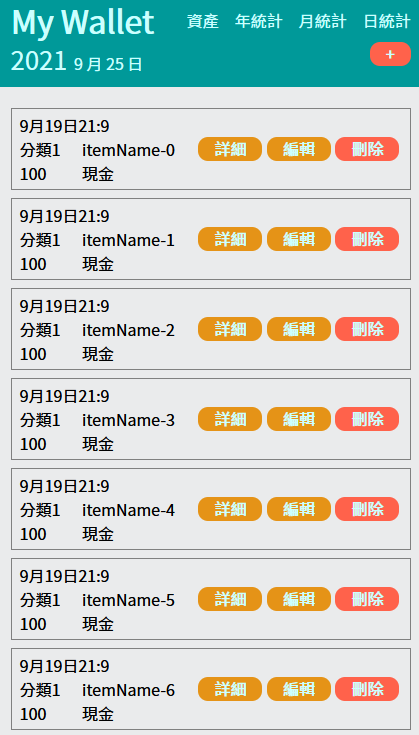
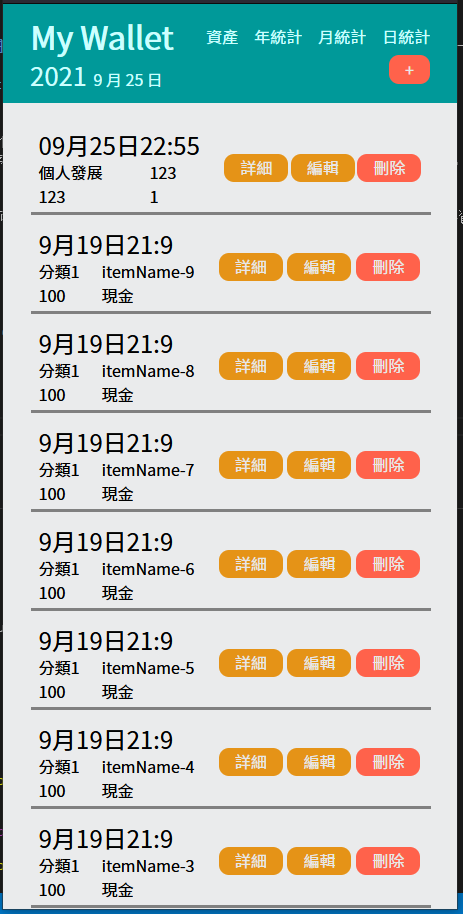
初步切版
上次增加完當日日期後,先將上次傳送進來的資料做整理排版
新增一個增加的按鈕連結,路由位置可以送到/expense/new,經由此路由可以到創建資料的頁面,
完成畫面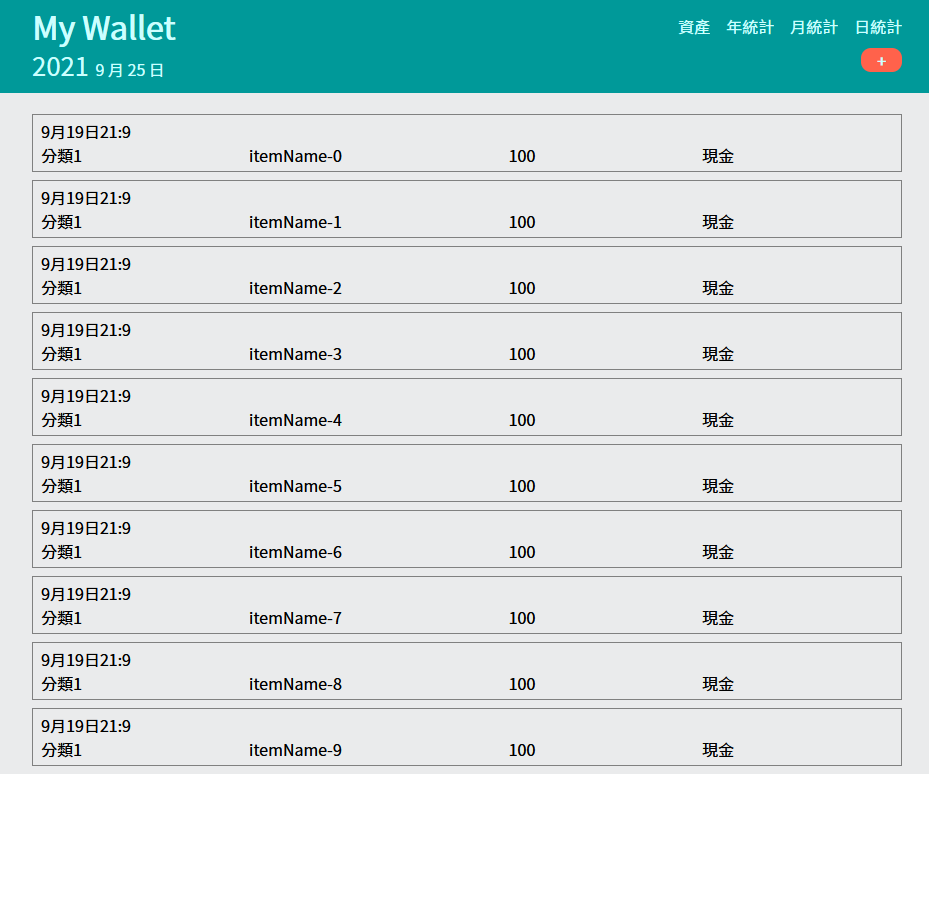
在資料上新增按鈕,可以檢視詳細內容,編輯,以及刪除。
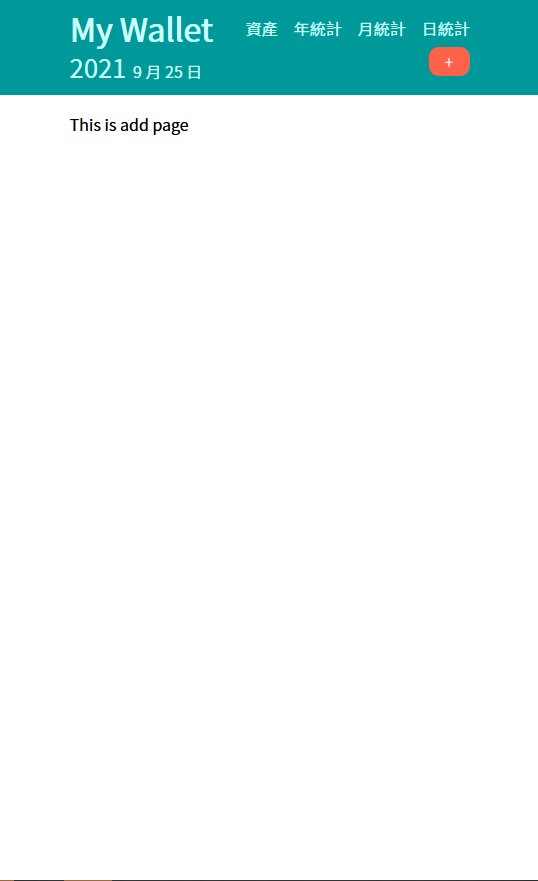
添加新增功能
開始製作新增功能頁面,在views下新開一個add.hbs,一樣先隨便添加一些html內容
再來設定路由,目標是當按下新增按鈕的時候,能夠將畫面銜接到新增的頁面
在routes > modules 下開一個expenses.js , 並設定好路由。1
2
3
4
5
6
7
8
9
10const express = require('express')
const router = express.Router()
const Expenses = require('../../models/expense') // 未來編輯或查看詳細資料都會使用到資料庫
router.get('/add', (req,res) => {
res.render('add')
})
module.exports = router設定按鈕連結至路由 /expenses/add
1
<a href="/expenses/add" class="btn-create btn-common">+</a>
成功連結畫面
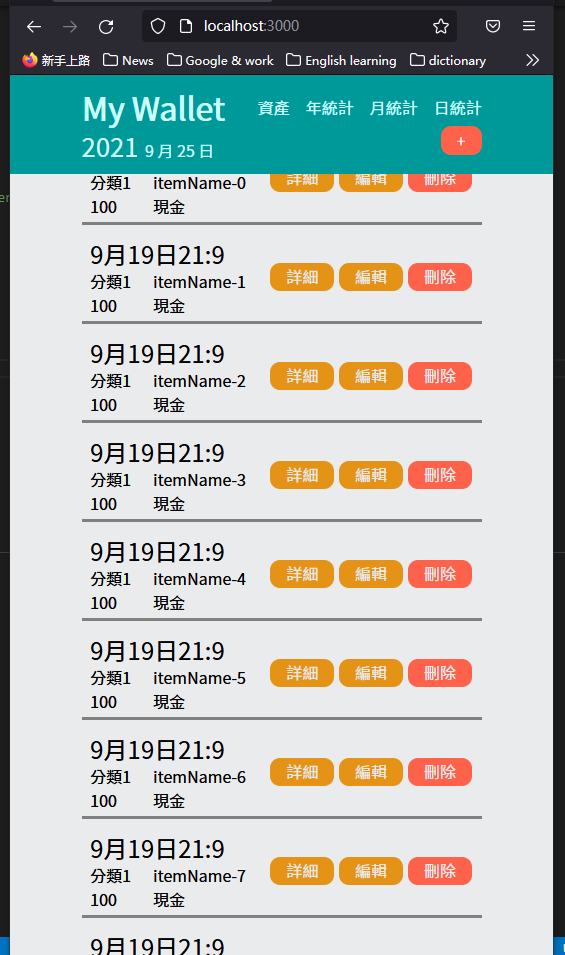
隱藏滾動條
這時候發現切換頁面時,版面會移動,因為滾動條出現的關係。
上網查了一下怎麼隱藏滾動條:
不能在CSS上設定 overflow-y: hidden,
雖然滾動條會隱藏,但是連滾動也都會失效,
所以又查了其他辦法,看到要依不同瀏覽器設定不同的CSS:
1 | /* Chrome瀏覽器 */ |
成功畫面
除錯
- 在切換到新增頁面的時候發現一個小錯誤,header內的當天日期沒有顯示,使用Devtool發現原來是在切換頁面的時候main.js內一開始設定抓取元素的常數,無法重複宣告,所以要將置入時間設定成為一個function,可以重複呼叫使用,這些常數變數的作用域就不會重覆到。
1
2
3
4
5
6
7
8
9function innerTitleDate() {
const year = document.querySelector('.year')
const monthDate = document.querySelector('.month-date')
const date = new Date()
year.innerText = date.getFullYear()
monthDate.innerText = `${date.getMonth() + 1} 月 ${date.getDate()} 日`
}
innerTitleDate()
設定add page的HTML form
- 設計新增頁面的表單,表單action要送到 /expenses/add , method 要設定為 POST完成後的html及完成照
1
2
3<form action="/expenses/add" method="POST" id="form">
<!-- 添加 input -->
</form>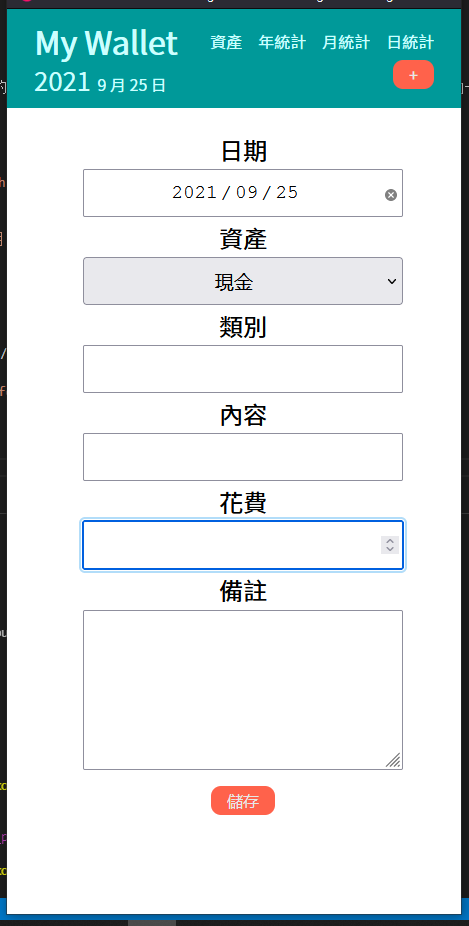
1
2
3
4
5
6
7
8
9
10
11
12
13
14
15
16
17
18
19
20
21
22
23
24
25
26
27
28
29
30
31
32
33
34
35
36
37
38
39
40
41
42<div class="container">
<div class="main-wrapper">
<form action="/expenses/add" method="POST" id="form">
<div class="input-wrapper">
<label for="input-date">日期</label>
<input type="date" class="input-date" id='input-date' name="time">
<label for="input-method">資產</label>
<select class="input-method" id="input-method" name="method">
<option value="0">現金</option>
<option value="1">信用卡</option>
<option value="2">帳戶轉帳</option>
</select>
<label for="input-category">類別</label>
<input class="input-category" id="input-category" list="options-category" name="category">
<datalist id="options-category">
<option>選擇一項類別,或自行輸入</option>
<option>食物</option>
<option>社交</option>
<option>個人發展</option>
<option>交通</option>
<option>文化</option>
<option>家居</option>
<option>服飾</option>
<option>美容</option>
<option>健康</option>
<option>教育</option>
<option>禮物</option>
<option>其他</option>
</datalist>
<label for="input-item-name">內容</label>
<input type="text" class="input-item-name" id="input-item-name" name="itemName">
<label for="input-cost">花費</label>
<input type="number" class="input-cost" id="input-cost" name="cost" inputmode="numeric">
<label for="remark-textarea" class="input-remark">備註</label>
<textarea name="remark" id="input-remark-area" cols="30" rows="10"></textarea>
<button class="btn-common" type="submit">儲存</button>
</div>
</form>
</div>
</div>
<script src="/javascripts/add.js"></script>
創建自動帶入當日日期
- 可以設置一個add專用的js,目的是當新建時,會自動置入當天日期,優化UI體驗
input date的值為 xxxx-xx-xx,例如2021-01-01,當位數少於兩位數時,請先補上0,不然無法正常顯示。
1 | const inputDate = document.querySelector('.input-date') |
完成後接著就要來設定路由啦! 將取得的資料存入資料庫當中。
將資料存入資料庫
- 在設定路由之前,express要先設定使用 body-parser ,新版的express已經有將body-parser納入模組中,舊版的就得另外安裝npm install body-parser,我們直接使用模組的body-parser不另外安裝這樣才有辦法取得瀏覽器送出POST行為時的的表單資料(req.body的資料),在路由端收到資料後可以直接轉化成JS的物件型態,再將其轉存進資料庫。
1
app.use(express.urlencoded({extended: true}))
複習:當使用GET送出的話,資料會顯示在瀏覽器網址列上,有一種作法是將連結設定到某個路由位置,伺服器端路由器設定當取得某一個動態路由:params,就可以將這網址的動態路由部分,作為參數使用,範例:
1 | app.get('/movies/:movie_id', (req, res) => { |
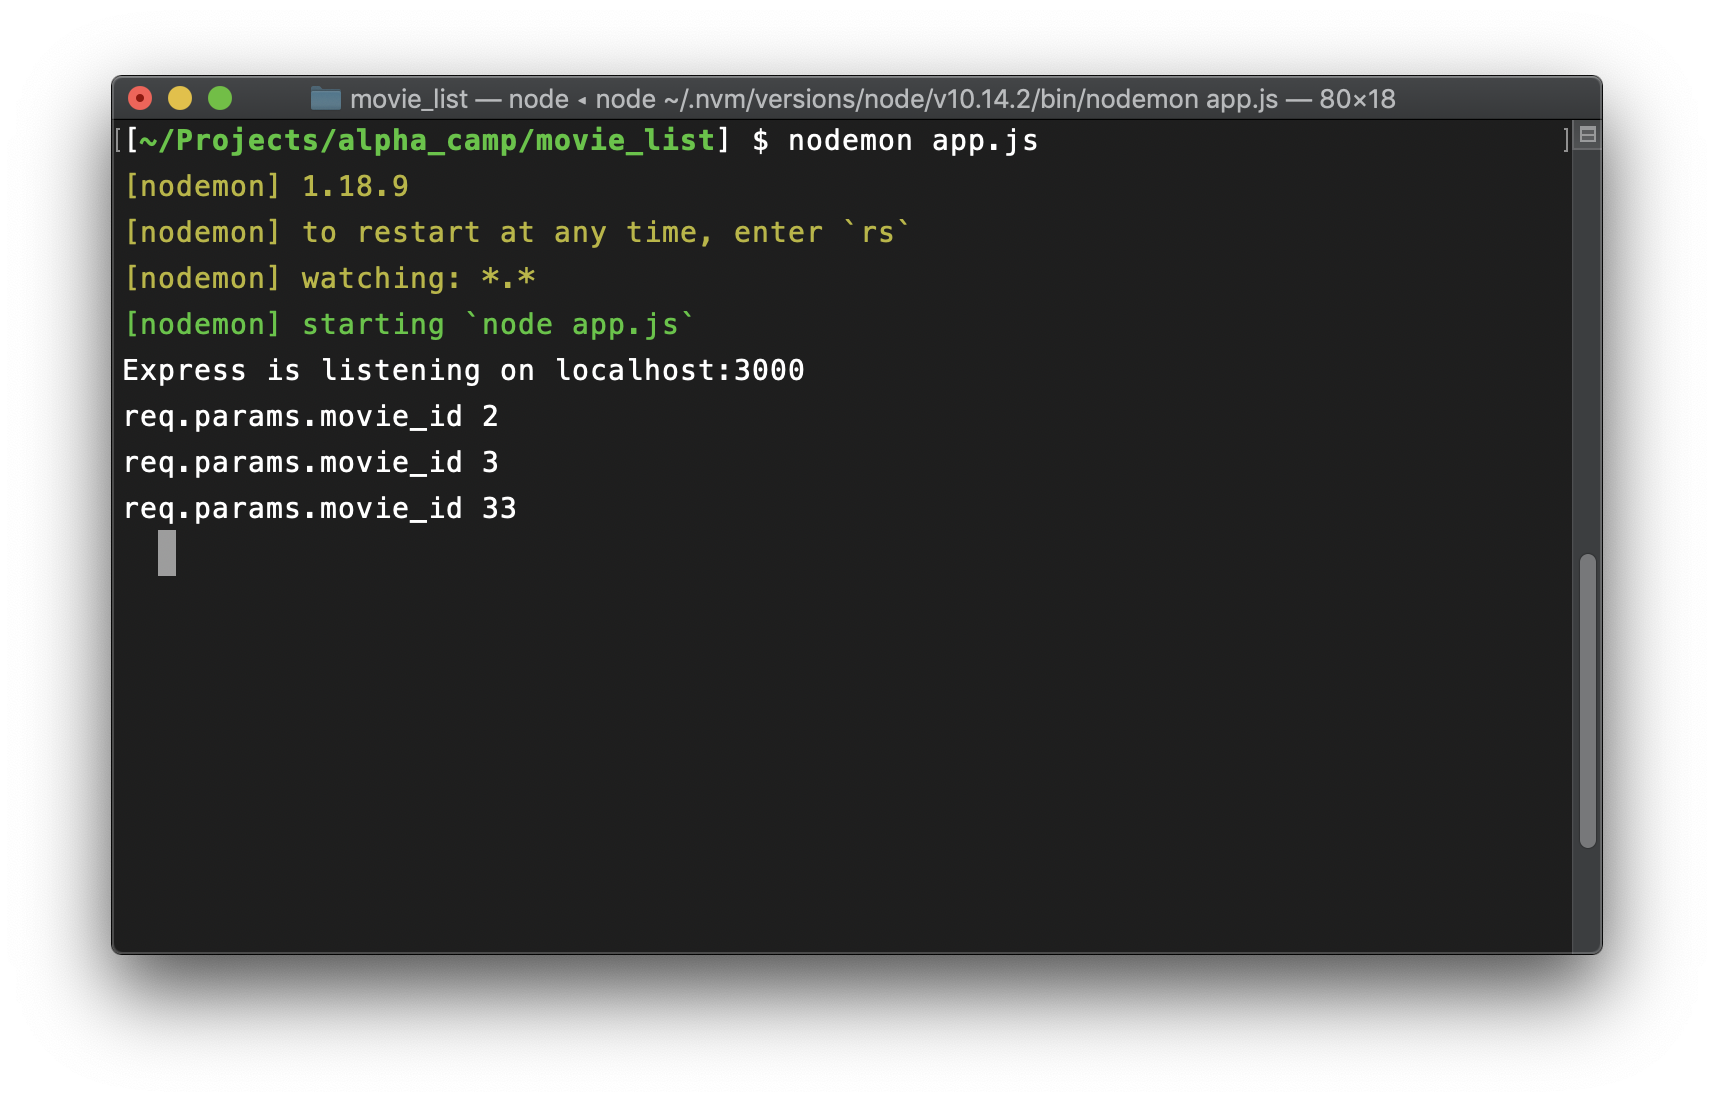
可以看到,當客戶端送出不同的網址時,req.params.movie_id部分會跟著網址變動
另一種是當表單,例如在撰寫html的input時input會綁一個name屬性,當送出表單的action發送到某個路由位置,可以看到瀏覽器上最後會有個?後面帶著input設定的name=value(input的value),此使可以在路由中可以透過req.query來取得name和value,範例:
1 | app.get('/search', (req, res) => { |
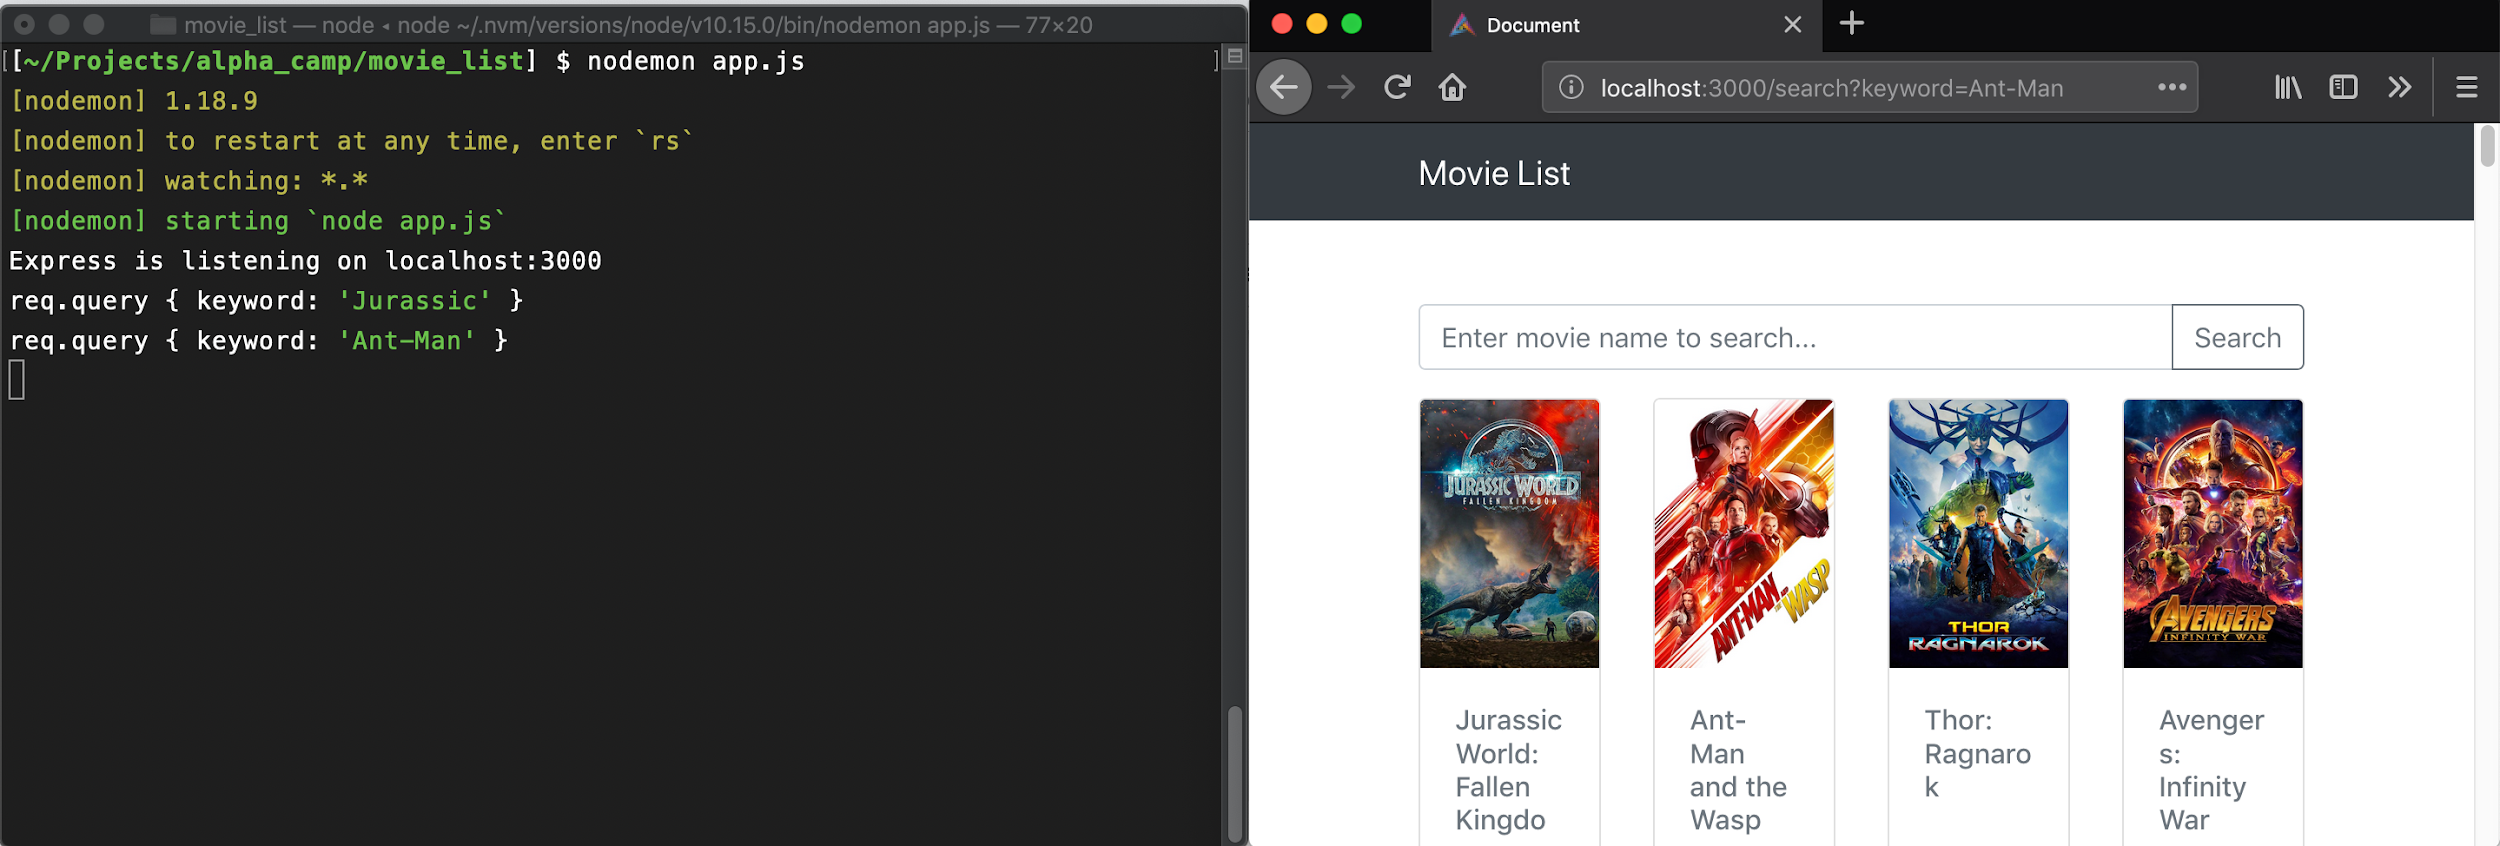
可以看到網址最後有一個?keyword=Ant-Man,search為路由器,keyword為input設定的name,Ant-Man為input的值
- 到routes > modules > expenses.js 設定路由
可以先加入,意思是當form送出時,會發出到 method為POST,到/expenses/add這個位置,伺服器收到請求後,做出console.log(req.body)1
2
3router.post('/add', (req,res) => {
console.log(req.body)
})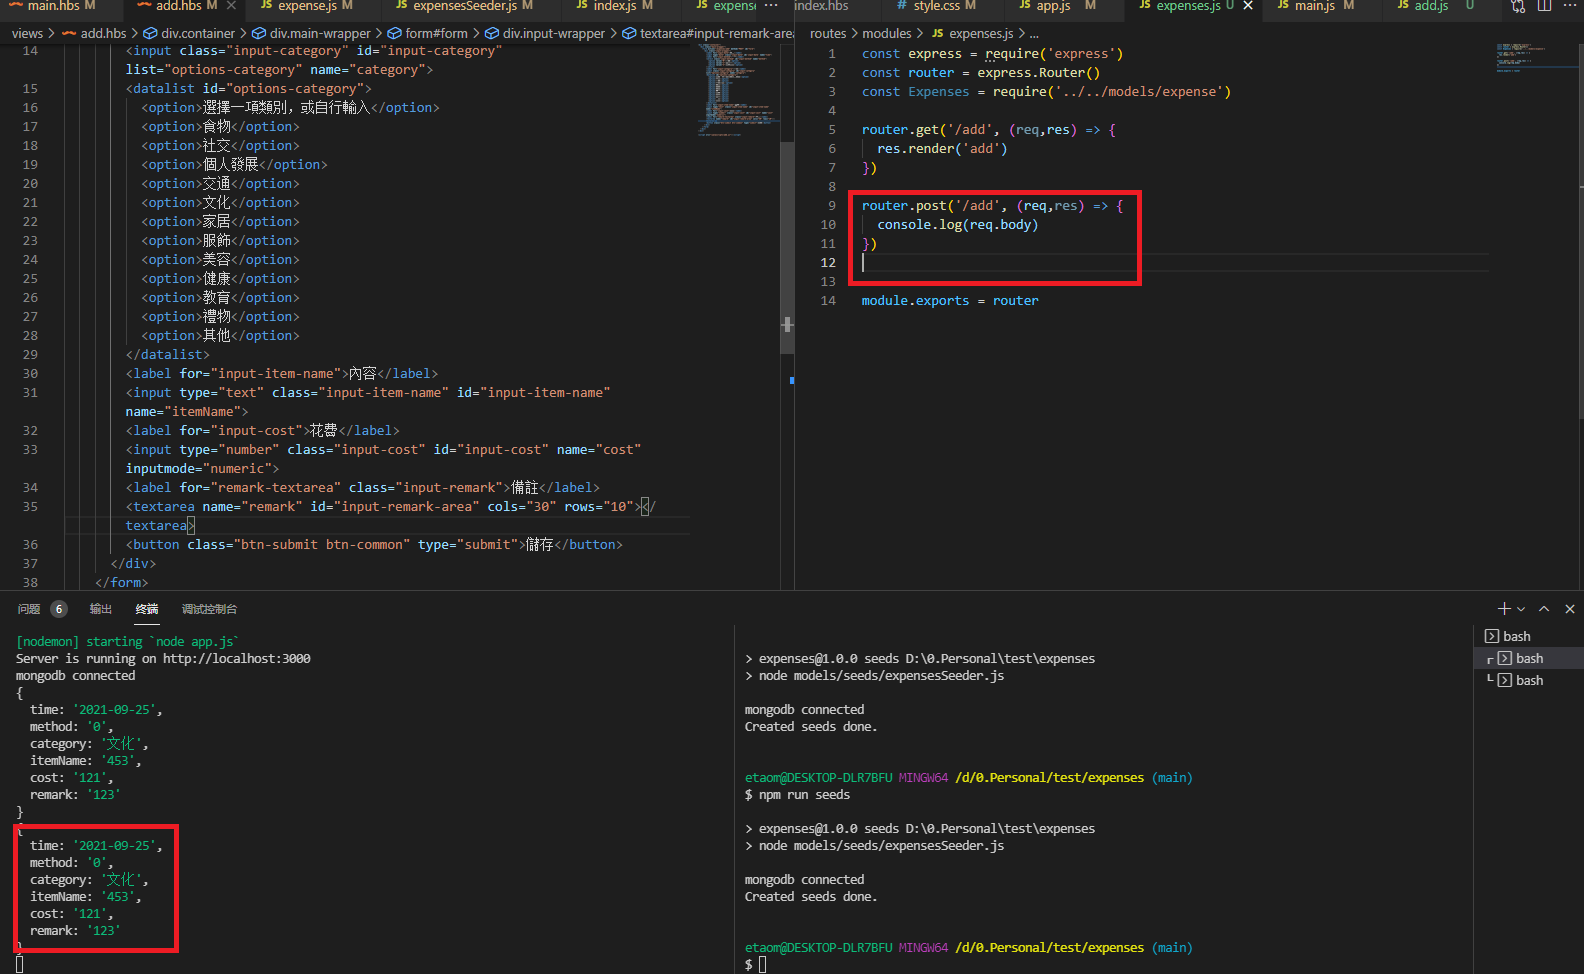
此時可以看到表單的內容已經轉化成Javascript的物件,接著就可以將物件裡的屬性存成各個變數再帶入資料庫,
1 | router.post('/add', (req,res) => { |
先說明解構賦值 (destructuring assignment)語法,主要就是想要把物件裡的屬性一項項拿出來存成變數時,可以使用的一種縮寫:
1 | const { method, category, itemName, cost, remark }= req.body |
而time因為是一個字串,格式為 xxxx-xx-xx,所以要先使用split轉為陣列,再將每段字串,個別放入不同的變數當中。
最後使用mongoose的 .create({}) ,創建一筆資料,依序存入變數原本寫法為 { category: category, itemName:itemName,},
上面也是簡化寫法。第一個為資料庫的key值,第二個為value,相同時可以簡寫。
最後使用res.redirect(‘/‘)返回首頁。
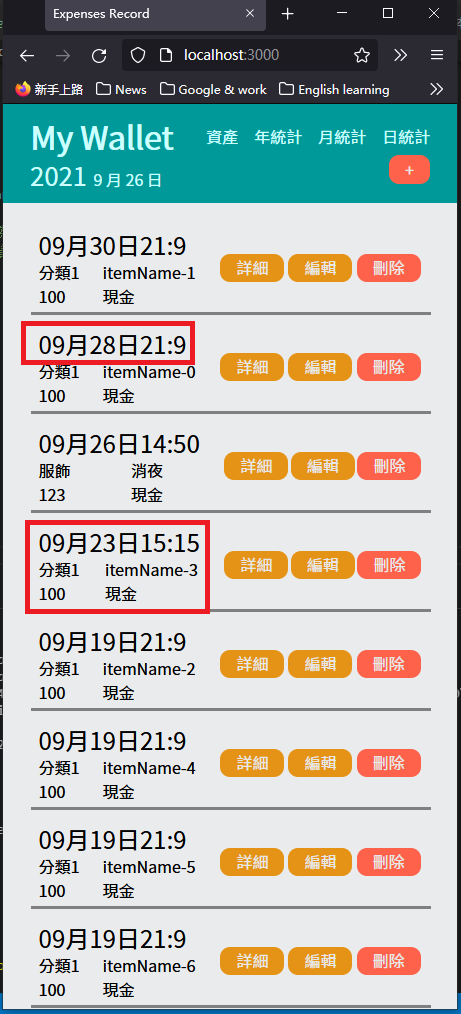
- 發現最後建立的資料跑到最後一筆,希望最後寫的資料可以呈現在最上面,所以到routes > modules > home.js 改寫路由取得資料後的排序方式
1
2
3
4
5
6
7router.get('/', (req, res) => {
Expenses.find()
.lean()
.sort({ _id: 'desc' }) // 這邊改為desc反序
.then(expenseItems => res.render('index', { expenseItems }))
.catch(error => console.log(error))
})
最後畫面
第三日記錄:
今天週六,最近工作在趕案子,這幾天都趕圖做滿晚的,其實原本想休息,結果還是閒不下來,最後還是開了檔案繼續完成,結果一坐下來,又陸陸續續複習了很多東西,還完成了初步的建立資料,也是值得開心的一個小進度,計畫明天把剩下的幾個初步功能完成,我想應該沒問題。
新學習項目:
- 隱藏滾動條
day 3 結束
day 4
今天開始來實作其他的功能,先從編輯開始下手
添加編輯功能
- 因為已經做好了新增畫面,可以使用同樣畫面表單來做編輯使用,可以先將add.hbs內容複製倒edit.hbs,複製完記得將最後的script刪除
1
2
3<!-- 最後原本從add.hbs複製過來導入的add.js,記得刪除 -->
<script src="/javascripts/add.js"></script>
<!-- 以上刪除 -->
接著我們順先一下邏輯,我要從index的列表上,點擊編輯後,有辦法從資料庫找到正確的資料,然後把資料顯示在edit的畫面上,然後再透過儲存,將原本的資料修改掉,所以:
- index的列表編輯按鈕連結上,要綁上各個資料的ID
- 藉由網址ID,找到正確的路由,並且透過動態路由,來取得req.params.id,並透過ID從資料庫取得資料,並帶入edit 頁面
- 最後要更新的內容表單送出後經過正確路由,將新的資料存回資料庫。
首先改寫 index 列表編輯按鈕上的連結,連結要綁上ID到edit的路由位置
1
2
3
4
5
6<div class="item-btn-wrapper">
<a href="#" class="btn-detail btn-common">詳細</a>
<!-- 這邊連結綁上id -->
<a href="/expenses/{{this._id}}/edit" class="btn-edit btn-common">編輯</a>
<a href="#" class="btn-delete btn-common">刪除</a>
</div>回到 routes > modules > expenses.js 新增路由:
透過網址的動態參數,取得資料庫資料ID,並帶入資料庫搜尋,搜尋後要使用lean()將物件轉為單純物件,在使用then將資料帶入edit頁面的各個input的value1
2
3
4
5
6
7
8router.get('/:id/edit', (req,res) => {
const id = req.params.id
return Expenses.findById(id)
.lean()
.then(expense => {
res.render('edit', {expense})
})
})
這時候應該可以從資料庫取得正確資料,並在edit頁面上顯示在各個input裡面。
除錯
- 在點到種子資料的時候發現,時間資料無法正確帶入,由於input的時間value格式必須是 yyyy-mm-dd,但得到的資料mm跟dd卻是個位數,那是因為在設定資料結構及種子資料時,將時間的型式設定成Number,而且種子資料也只輸入了個位數字而已,所以我們先處理這個問題,修正資料結構,及種子資料
1
2
3
4
5
6
7
8
9
10
11
12
13
14
15
16
17
18
19
20
21
22
23
24
25
26
27
28
29const expenseSchema = new Schema({
...
remark: {
type: String,
},
time: {
year: {
type: String, // 修正為字串
required: true,
},
month: {
type: String, // 修正為字串
required: true,
},
date: {
type: String, // 修正為字串
required: true,
},
hour: {
type: String, // 修正為字串
required: true,
},
minute: {
type: String, // 修正為字串
required: true,
},
}
})
接著修正種子資料
1 | db.once('open', () => { |
刪除資料,並重新生成一次種子資料,做測試,應該會正常,由於新增的日期資料本來就是以正確的格式字串存入資料庫,所以這邊沒有問題。
修改資料並儲存
- 最後再新增一個路由,就是edit頁面的表單送出,要透過router.put的方式,把更新後的資料存回資料庫,所以:
我們先改寫edit頁面,將元素form的action,目的地最後補上 ?_method=PUT ,目的是透過路由器尋找是PUT的方式,但原則上他還是屬於POST,只是為了達到CRUD語意化。
1 | <div class="container"> |
app.js載入 method-override
接著載入一開始初始化資料夾我們就已經下載好的method-override工具包,不然透過參數方式添加的method=PUT,路由器會無法辨識,請在app.js補上1
2const methodOverride = require('method-override')
app.use(methodOverride('_method'))最後回到routes > modules > expenses.js,新增路由
1 | router.put('/:id', (req,res) => { |
成功修改資料並呈現於畫面上
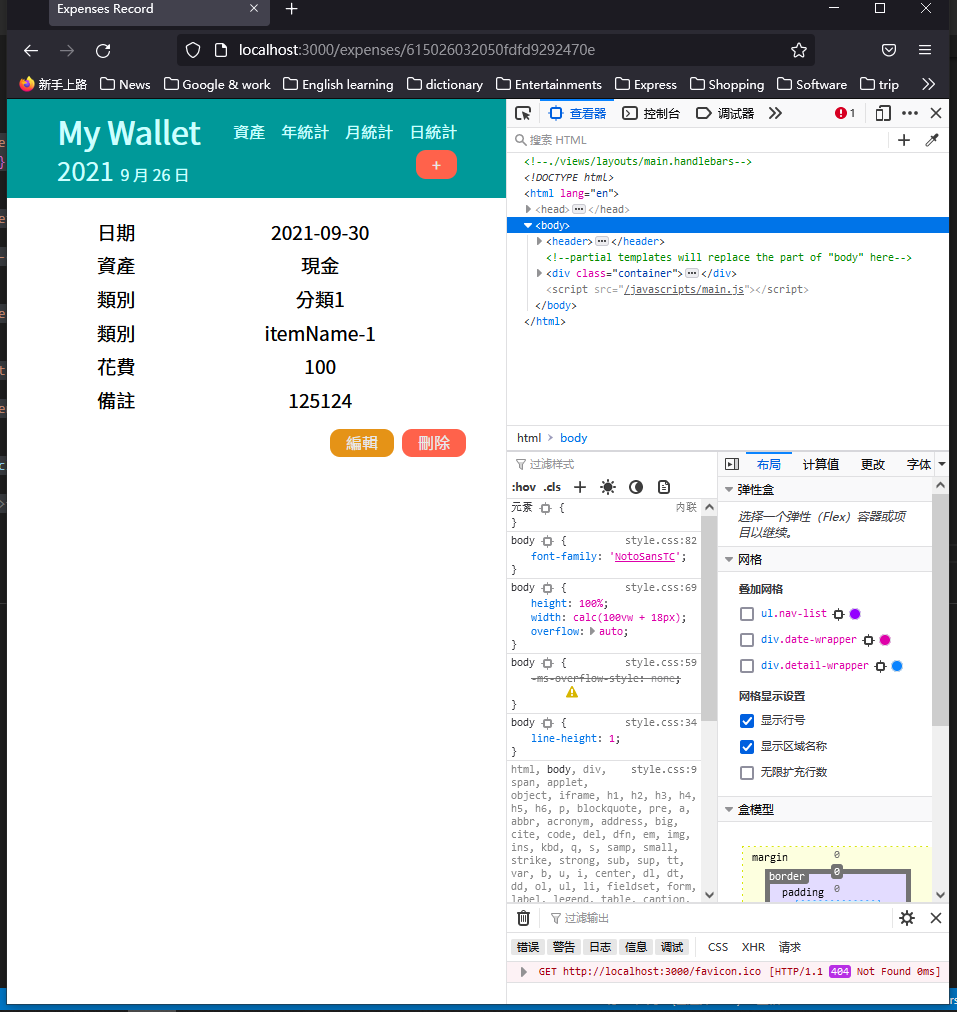
製作詳細資料畫面
接著一樣可以使用編輯或是新增的這個頁面去做修改,來製作成詳細訊息頁面,所以一樣先開一個detail.hbs的資料夾,然後將HTML複製進去,在來改寫input,將它變成單純的div元素
1
2
3
4
5
6
7
8
9
10
11
12
13
14
15
16
17
18
19
20
21
22
23<div class="container">
<div class="main-wrapper">
<div class="detail-wrapper">
<div class="date-text">日期</div>
<div class="expense-date" id='expense-date'>{{expense.time.year}}-{{expense.time.month}}-{{expense.time.date}}
</div>
<div class="method-text">資產</div>
<div class="expense-method" id='expense-method'>{{expense.method}}</div>
<div class="category-text">類別</div>
<div class="expense-category" id='expense-category'>{{expense.category}}</div>
<div class="item-name-text">類別</div>
<div class="expense-item-name" id='expense-item-name'>{{expense.itemName}}</div>
<div class="cost-text">花費</div>
<div class="expense-cost" id='expense-cost'>{{expense.cost}}</div>
<div class="remark-text">備註</div>
<div class="expense-remark" id='expense-remark'>{{expense.remark}}</div>
</div>
<div class="detail-btn-wrapper">
<a href="/expenses/{{expense._id}}/edit" class="btn-edit btn-common">編輯</a>
<a href="#" class="btn-delete btn-common">刪除</a>
</div>
</div>
</div>開始切版
index 的詳細按鈕連結綁上物件ID
1
2
3
4
5<div class="item-btn-wrapper">
<!-- 綁上資料ID到網址 -->
<a href="/expenses/{{this._id}}" class="btn-detail btn-common">詳細</a>
<a href="/expenses/{{this._id}}/edit" class="btn-edit btn-common">編輯</a>
</div>路由新增
1
2
3
4
5
6
7
8
9router.get('/:id', (req, res) => {
const id = req.params.id
return Expenses.findById(id)
.lean()
.then(expense => {
res.render('detail', { expense })
})
.catch(error => console.log(error))
})
完成畫面
- 優化,增加 “收入或支出” 資料格,並添加到各個頁面
添加刪除功能
改寫各個頁面的刪除按鈕元素,這按鈕要用一個form去綁住,才能設定以DELETE的路由方式送出,
1 | <form action="/expenses/{{expense._id}}?_method=DELETE" method="POST" id="delete-form"> |
添加路由控制,由資料庫藉由找ID找到資料後,使用.remove()刪除資料
1 | router.delete('/:id', (req,res) => { |
目前,新增、讀取、更新、刪除四個基本功能齊全了,後續還可以在慢慢添加更多功能,接著想來試著製作一個簡單的註冊及登入系統,會依照使用者取出不同的資料。
此作業暫時到這邊結束
接下來會自己嘗試非課程內的功能
第四日記錄:
今天花了半天時間,差不多就完成了剩下的功能,大致上沒有什麼問題,反而是感覺一開始初建階段比較困難,但整個大架構一出現,邏輯就變得很清晰,比較知道從何下手改動,但一開始若不清楚路由要怎麼定義,handlebars樣板名稱未確定,資料結構也不知道的狀態下,很多變數不清楚要一步一步建立起來比較困難,目前這個專案暫時到這邊,但接著會嘗試增加一些自己沒上過課也沒嘗試過的功能,然後繼續記錄下去。
day 4 結束
額外練習及嘗試 day 1
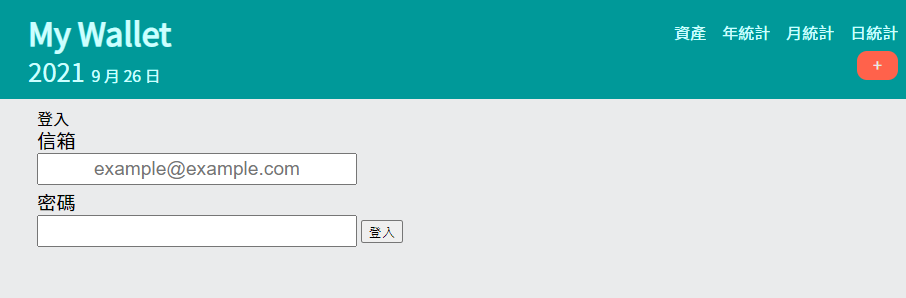
製做登入畫面
複製一份index畫面,並將原本的index畫面改為製作草稿登入畫面
先順一下登入系統的邏輯
先要有使用者的資料結構及資料庫
當輸入好帳號密碼後,透過js綁定登入按鈕監聽,可以進行撈資料庫資料的使用者資料做比對
有相符合的資料才透過路由進入到使用者的資料畫面
先建立資料結構及資料庫,一樣在跟目錄下的 models 開一個account.js,設定帳戶結構
1
2
3
4
5
6
7
8
9
10
11
12
13
14
15
16
17
18
19
20
21
22
23
24
25
26
27
28
29
30
31
32const mongoose = require('mongoose')
const Schema = mongoose.Schema
const accountSchema = new Schema({
name: {
type: String,
required: true,
},
email: {
type: String,
required: true,
},
password: {
type: String,
required: true,
},
registerTime: {
year: {
type: String,
required: true,
},
month: {
type: String,
required: true,
},
date: {
type: String,
required: true,
},
}
})
module.exports = mongoose.model('Account', accountSchema)創建種子資料
1
2
3
4
5
6
7
8
9
10
11
12
13
14
15
16
17
18const Account = require('../account')
const db = require('../../config/mongoose')
db.once('open', () => {
for ( let i = 0; i < 10; i++){
Account.create({
name: 'Peter',
password: '1234567',
email: '123@example.com',
registerTime: {
year: '2021',
month: '09',
date: '19',
}
})
}
console.log('Created seeds done.')
})設定腳本,執行種子資料創建種子資訊
製作登入畫面用js檔案,於public > javascripts 下建立login.js,並載入index頁面後來發現靜態檔案是無法取得資料庫連線的,所以還是得透過路由來取得資料庫
所以改變作法,由路由下手,先在routes > index.js 增加一個login路由路徑
1
2const login = require('./modules/login')
router.use('/login', login)然後到 routes > modules > 建立一個login.js,並寫入路由
1
2
3
4
5
6
7
8
9
10
11
12
13
14
15
16
17
18
19
20
21
22
23
24
25
26
27
28
29
30
31const express = require('express')
const router = express.Router()
const Account = require('../../models/account') // 需要帳號的collection
const Expenses = require('../../models/expense') // 也需要花費的collection
// 當登入按鈕發送出 http://localhost:3000/login的時候
router.post('/', (req, res) => {
// 取得輸入的email
const email = req.body.email
// 取得輸入的password
const password = req.body.password
// 使用findOne到帳號資料庫裡尋找第一個符合這兩個條件的資料
Account.findOne({ email: email, password: password })
.lean()
// 如果有只到的話user就不會是undefine,如果是undefine,則渲染登入失敗頁面
.then(user => {
if (!user) {
return res.render('loginFail')
}
// 接著藉由帳號裡面expenses的陣列資料,這個expenses裡面存放的是它在expenses collection中屬於他的資料的index,將這些資料找出來,然後呈現在畫面上
// 這邊使用了 $in ,意思是過濾所有id 只要id符合陣列內ID都調出來
Expenses.find({_id : { $in : user.expenses}})
.lean()
.then(expenseItems => {
return res.render('list', { expenseItems })
})
})
.catch(error => console.log(error))
})
module.exports = router到目前為止都沒問題,但後來發現多了帳號識別後,不知道要如何做新增的動作,不知道要怎麼把索引帶入帳號內,而且更重要的問題是,如何保持登入狀態?
額外練習嘗試第一日記錄:
第一次嘗試製作登入系統,發現有很多隱藏的問題,例如帳戶的資料型態要怎麼設定,資料(collection)跟資料(collection)之間的關係要使用哪種方式,一對一,一對多,多對多? 哪一種方式適合要依專案需求決定以及資料內容的大小,16MG的document大小,接著又碰到了如何保持登入狀態的問題,才了解到這跟cookie有關,也是我一直不了解的部分,打算明天有空來學習這部分的新知識。
新學習項目
在 MongoDB 資料庫裡,最基本的概念以下四項:database、collection、document 及 field。如果有學習過 MySQL 的話,則可以從以下的對應關係來認識這四項:
| MongoDB | MySQL |
|---|---|
| database | database |
| collection | table |
| document | row |
| field | column |
一個 database 是由一個或多個 collections 所組成,而每個 collection 則是由一個或多個 documents 所組成。
db.collection: 如何用$in 將陣列作為多個過濾條件,並在指定的field中找尋符合的項目。
額外練習及嘗試 day 1結束
額外練習及常識 day 2
經過昨天的問題之後,看了 AlphaCamp的教學,學習如何使用cookies,也稍微了解了cookies的用處,,也在昨天搜尋了相關的資料跟資料間要採哪種關係,也比較有了頭緒,所以重新順一下邏輯順序:
- 當登入的時候,從資料庫找到帳戶後,就等於驗證成功
- 登入成功後,去產生一組亂數碼,這個亂數碼可以當作token驗證碼,把它設定成為cookies的key-value,也同時把它紀錄在帳戶底下,所以帳戶必須多一個資料格為token來存放驗證碼,隨後就將帳戶的user,傳入 /expanses/user 的路由下
- 改寫expanses內的路由,所有的路由前方必須添加一個/user路徑,/expense/user 成為了登入後的首個路徑
- 進到這個頁面後,先再次檢查登入狀態,如果cookie已經有紀錄token,就代表已經登入,如果沒有則回到根目錄’/‘。
- 如果有token就可以經由這個token去核對出正確的帳戶資料出來,帳戶資料內要再多增加一個陣列集合,裡面存放expense的id,用作之後來撈expenses collection內的資料。
- 同理,隨後所有的expenses路由都必須經過此驗證,所以可以寫成一個驗證function使用
- 根目錄的路由,同時也必須添加此驗證,
- 更新所有頁面的按鈕連結
- 新增或修改時,必須將expense document的id紀錄進去帳戶中,未來才能列出正確的資料
重新撰寫登入
- 設定登入的路由處理
routes > modules > login.js
1 | const express = require('express') |
- 改寫expenses內的路由
所有的expenses要添加:name在前面,以及所有的html鏈結,都要注意連到expenses後,都要再補上name
routes > modules > expenses.js
1
2
3
4
5
6
7
8
9
10
11
12
13
14
15
16
17
18
19
20
21
22
23
24
25
26const express = require('express')
const router = express.Router()
const Expenses = require('../../models/expense')
const Accounts = require('../../models/account')
// 當被引導至 expenses/username 當中
router.get('/:username', (req, res) => {
// 所有路由都要先取得username
const name = req.params.name
// 所有畫面都直接從cookie有無token作為登入狀態檢查
Accounts.findOne({ token: req.cookies.userToken })
.lean()
.then(account => {
// 如果驗證錯誤就返回根目錄
if (!account) return res.redirect('/')
// 不然就把所有expenses的資料找出屬於這個account的資料撈出來排列後顯示在畫面上
Expenses.find({ _id: { $in: account.expenses } })
.lean()
// 依時間排列
.sort({time : 'desc'})
.then(expenseItems => {
//除了帶入資料,還要帶入使用者名稱
return res.render('list', { expenseItems, name })
})
})
})路由: GET /expenses/:name/add
到建立新增畫面1
2
3
4
5
6
7
8
9
10
11// 所有的路由都要補上/:username,並在一開始加入驗證
router.get('/:name/add', (req, res) => {
const name = req.params.name
Accounts.findOne({ token: req.cookies.userToken })
.then(account => {
if (!account) {
return res.redirect('/')
}
return res.render('add', { name })
})
})路由: POST /expenses/:name/add
這邊要特別說明1
2
3
4
5
6
7
8
9
10
11
12
13
14
15
16
17
18
19
20
21
22
23
24
25
26
27
28
29
30
31
32router.post('/:name/add', (req, res) => {
// 一樣首先做驗證
Accounts.findOne({ token: req.cookies.userToken })
.then(account => {
if (!account) {
return res.redirect('/')
}
// 這邊透過指令意思是,找Expenses裡所有的物件,有_id這個項目的,按照id做倒反排序,並限制只找出一個,也就是第一個,
Expenses.findOne({}, { _id: 1 }).sort({ _id: -1 }).limit(1).then(expense => {
// 把反序找出來的id也就會是最後的一個,再把它加上1,就是最新的一個id號碼
const idNumber = Number(expense._id) + 1
// 把相關的數值宣告出來
const name = req.params.name
const time = {
year: req.body.time.split('-')[0],
month: req.body.time.split('-')[1],
date: req.body.time.split('-')[2],
hour: new Date().getHours(),
minute: new Date().getMinutes(),
}
const { method, inOrOut, category, itemName, cost, remark } = req.body
// 消費創建資料,_id為新的id號碼,其他為input裡的資料
Expenses.create({ _id: idNumber, category, itemName, inOrOut, cost, method, remark, time }).then(
// 然後找出正確的帳戶,並在帳戶上的expenses陣列中添加新id號碼
Accounts.findOneAndUpdate({ token: req.cookies.userToken }, { $addToSet: { expenses: idNumber } })
// 最後返回/expenses/:name
.then(res.redirect(`/expenses/${name}`))
)
})
})
.catch(error => console.log(error))
})
mongoDB collection 裡的陣列要添加新元素
- 正確語法: model.updateOne({key : value}, { $addToSet: { expenses: idNumber }} )
- 第一個參數是帶入要以什麼key和value最為條件尋找document
- $addToSet: 只能對陣列操作,在指定的名稱陣列內新增元素,如果元素有重複則不重複增加
- 在這個地方碰壁碰好久按照語法的使用,也沒成功,最後問題出現在資料型態設定錯誤,原本以為資料型態可以使用括號帶過,expenses: [] ,結果資料怎麼推都推不進去陣列裡面,完全無法操控,因為語法只能對陣列操作,後來發現是這邊寫錯沒有指定type: Array,所以無法對它進行增加或修改或減少…花了我好多時間才找出原因…
1
2
3
4
5
6
7
8
9
10
11
12
13
14
15
16
17
18
19
20
21
22
23
24
25
26
27
28
29
30
31
32
33
34const accountSchema = new Schema({
name: {
type: String,
required: true,
},
password: {
type: String,
required: true,
},
email: {
type: String,
required: true,
},
registerTime: {
year: {
type: String,
required: true,
},
month: {
type: String,
required: true,
},
date: {
type: String,
required: true,
},
},
token: {
type: String,
},
expenses: { // 原本這邊寫成了 expenses: []
type: Array,
},
})
現在新增資料後,會正確取得資料,並且顯示在畫面上了。
- 發現有問題,在主頁面清單上的按鈕的連結無法帶入user的位置
路由: POST /expenses/:name/
1 | const express = require('express') |
所以要將name推進去expenseItems的物件裡面
1 | router.get('/:name', (req, res) => { |
再去修改原本要帶入name的位置變成this.name
其他delete,編輯大致上都沒什麼問題
最後home.js也別忘了修改
1
2
3
4
5
6
7
8
9
10
11
12
13
14
15
16
17
18
19
20const express = require('express')
const router = express.Router()
const Accounts = require('../../models/account')
// 當進到網頁根木路時
router.get('/', (req, res) => {
// cookies是否存有Token驗證,無則渲染login畫面
if (!req.cookies.userToken) {
// 將原本的index改為login
return res.render('login')
}
// 如果有token就直接到資料庫比對token,就可以維持登入狀態,並將畫面直接引導至消費紀錄清單上
Accounts.findOne({ token: req.cookies.userToken })
.lean()
.then(account => {
return res.redirect(`/expenses/${account.name}`)
})
})
module.exports = router加上登出功能
只要加上登出按鈕,且將登出按鈕的連結綁上/logout路由,並且設定刪除cookie的userToken就可以了1
2
3
4router.get('/logout', (req,res) => {
res.clearCookie('userToken') // 刪除userToken的cookie
return res.redirect(`/`)
})重新調整登入頁面,切版
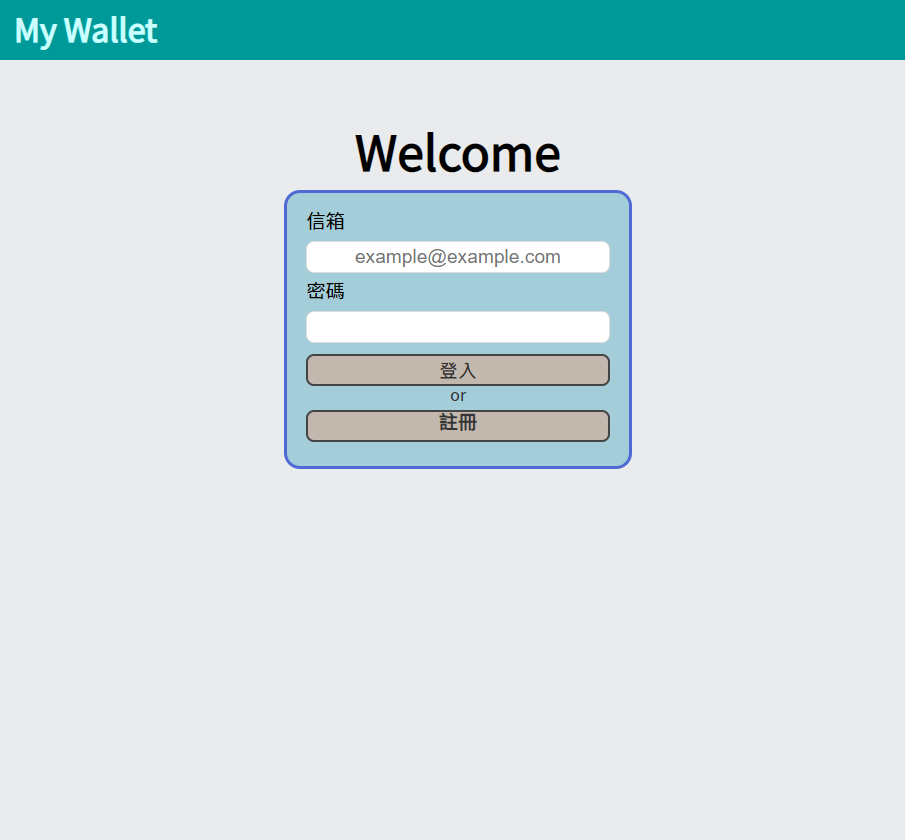
- 登入後header的相關資訊要顯示,寫在main.js
先將相關資訊CSS設定成none,等待登入後使用js檢查cookie是否有userToken,若有的話就將相關資料display轉為原本的值
1 | function checkLogin() { |
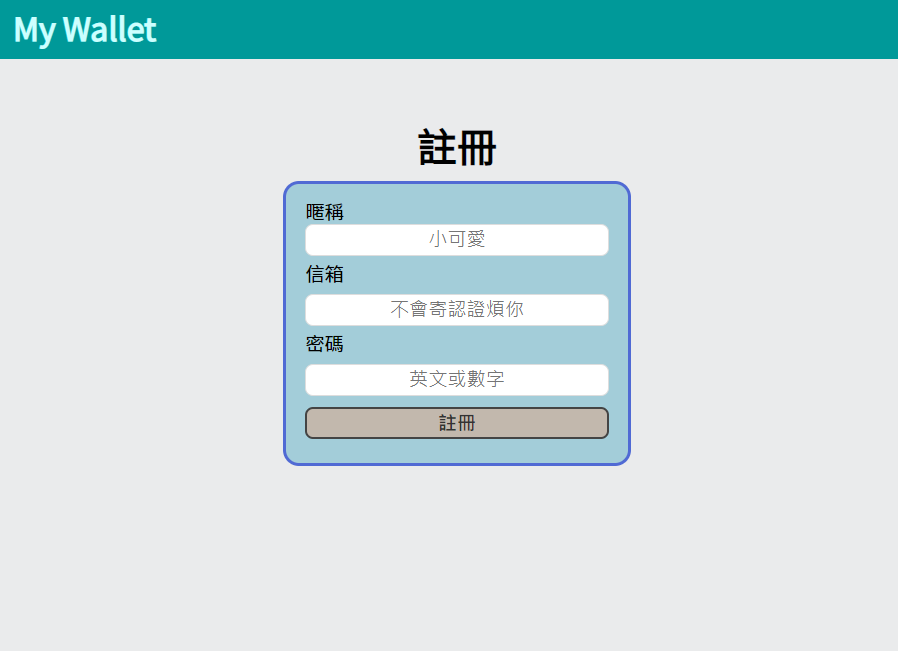
- 完成註冊系統
設一個新路由/register 並設計register.hbs頁面,最後通過路由取得資料建立帳戶1
2
3
4
5
6
7
8
9
10
11
12
13
14router.get('/register', (req, res) => {
res.render('register')
})
router.post('/register', (req, res) => {
const registerTime = {
year: new Date().getFullYear(),
month: new Date().getMonth() + 1,
date: new Date().getDate(),
}
const { name, password, email } = req.body
Accounts.create({ name, password, email, registerTime})
.then(res.redirect('/'))
})
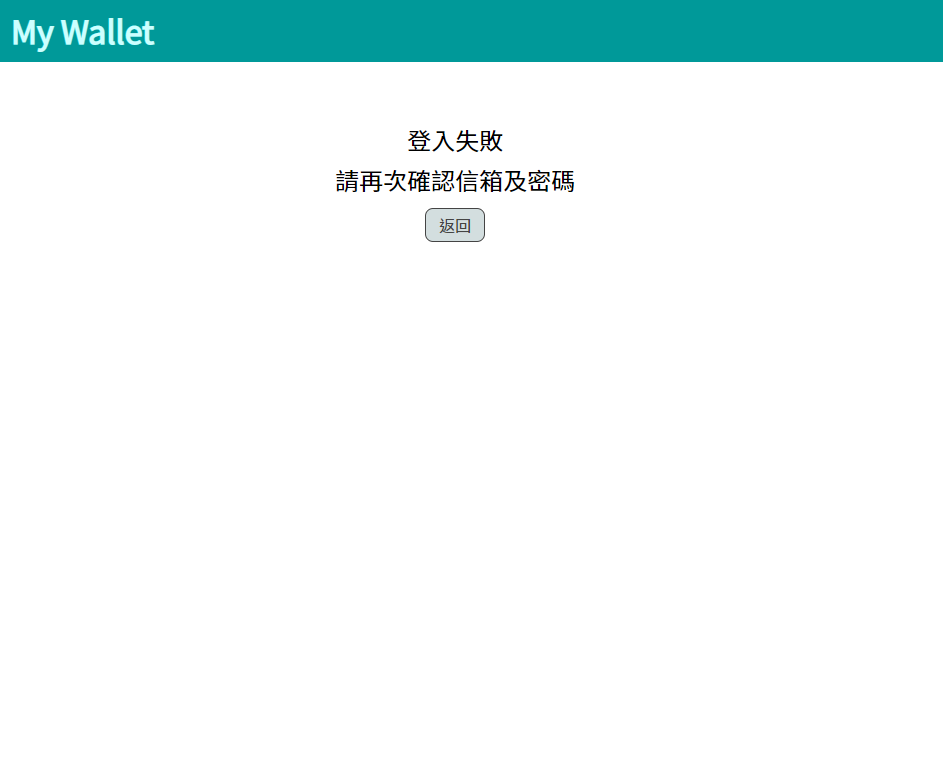
切版登入失敗畫面
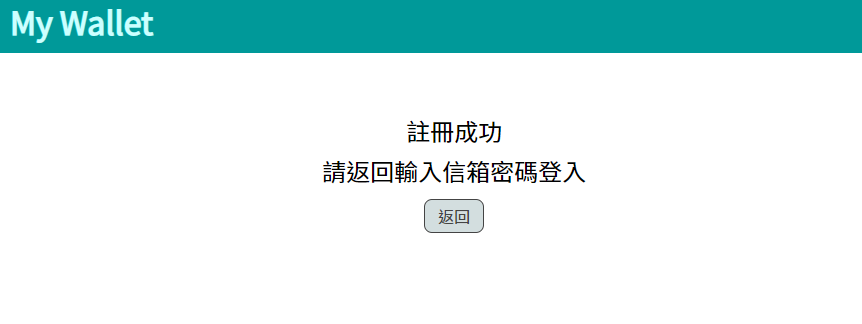
可以再添加一個註冊成功畫面優化。
上傳Heroku
接著我們來上傳到heroku吧!
需要有:heroku帳號
安裝heroku cli
MongoDB Atlas
mongoDB Atlas 設定 Organization > 設定Project > 設定 cluster > 設定connect
設定好cluster後按下 connect 來設定連線
設定允許所有IP連線,設定帳號密碼來連線這個cluster,帳號密碼可以自己複製存起來先貼到筆記本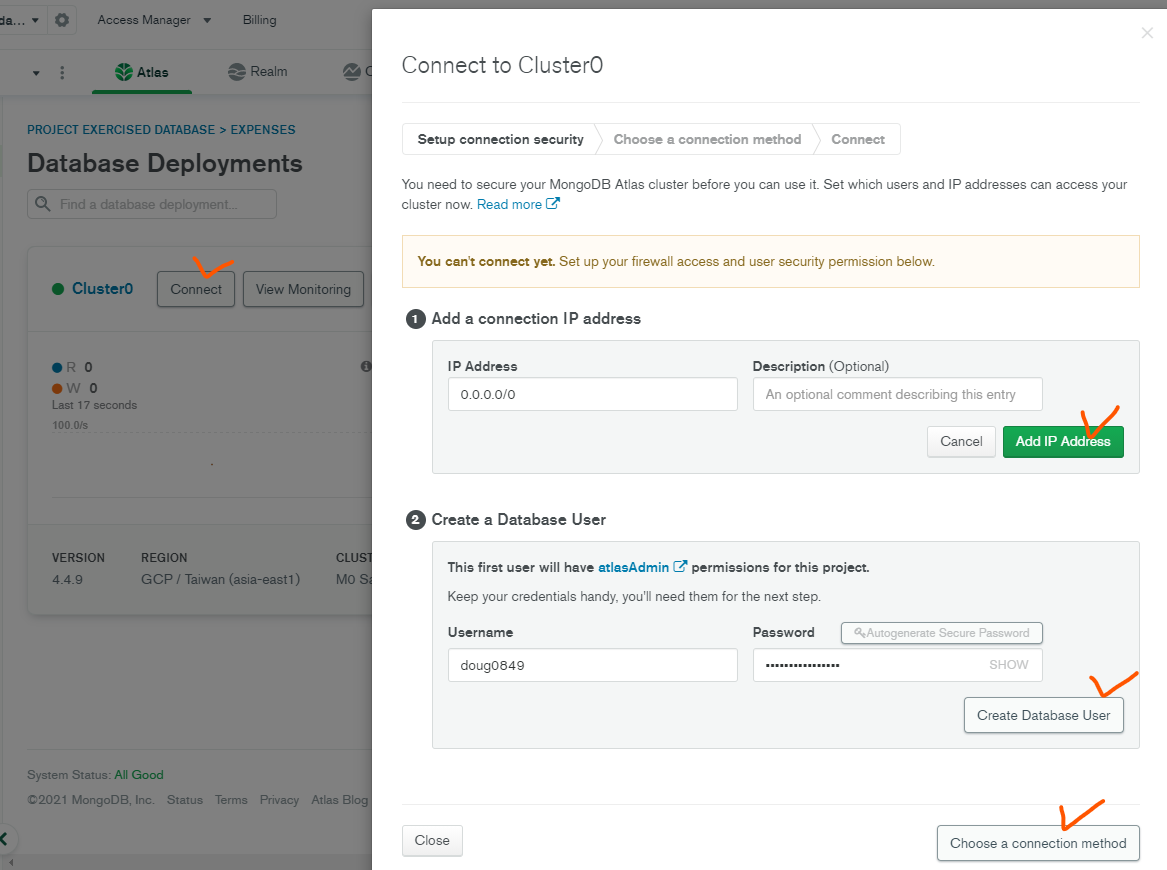
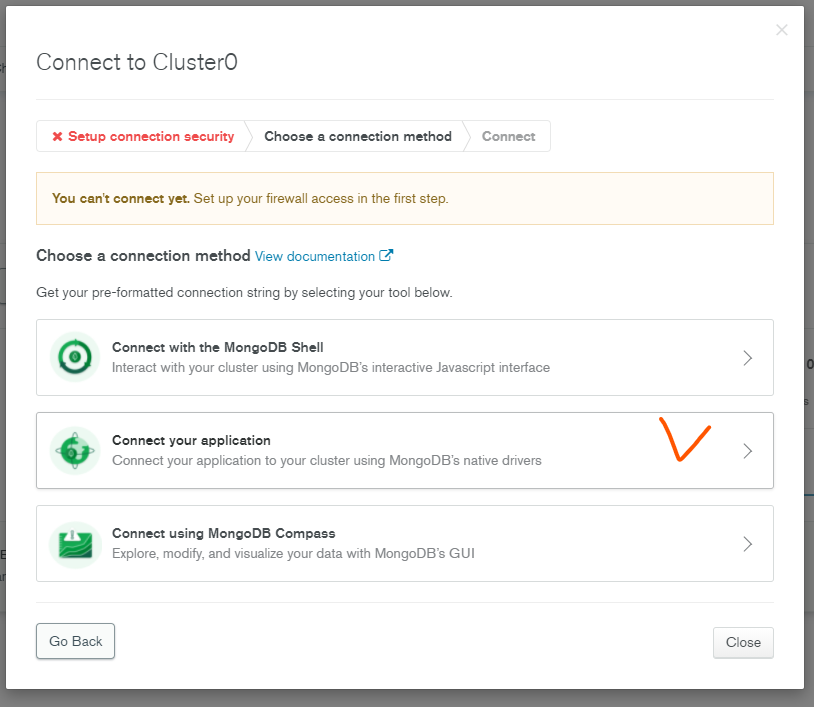
選擇使用後端程式來連線
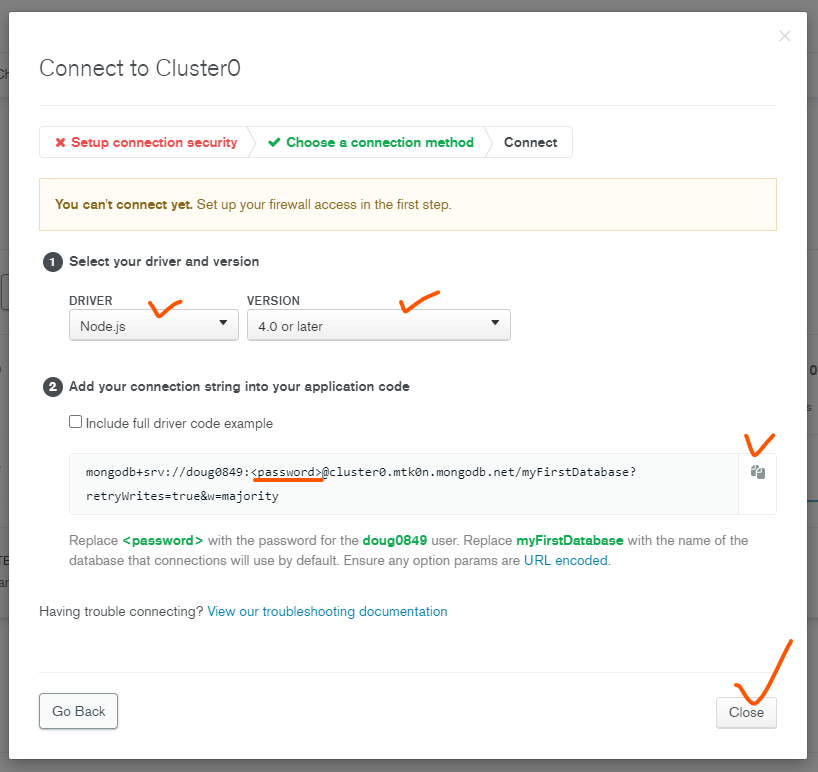
接著選擇開發環境,然後要把連線的網址複製下來
再來把專案推上heroku
使用終端機,輸入
 }
}
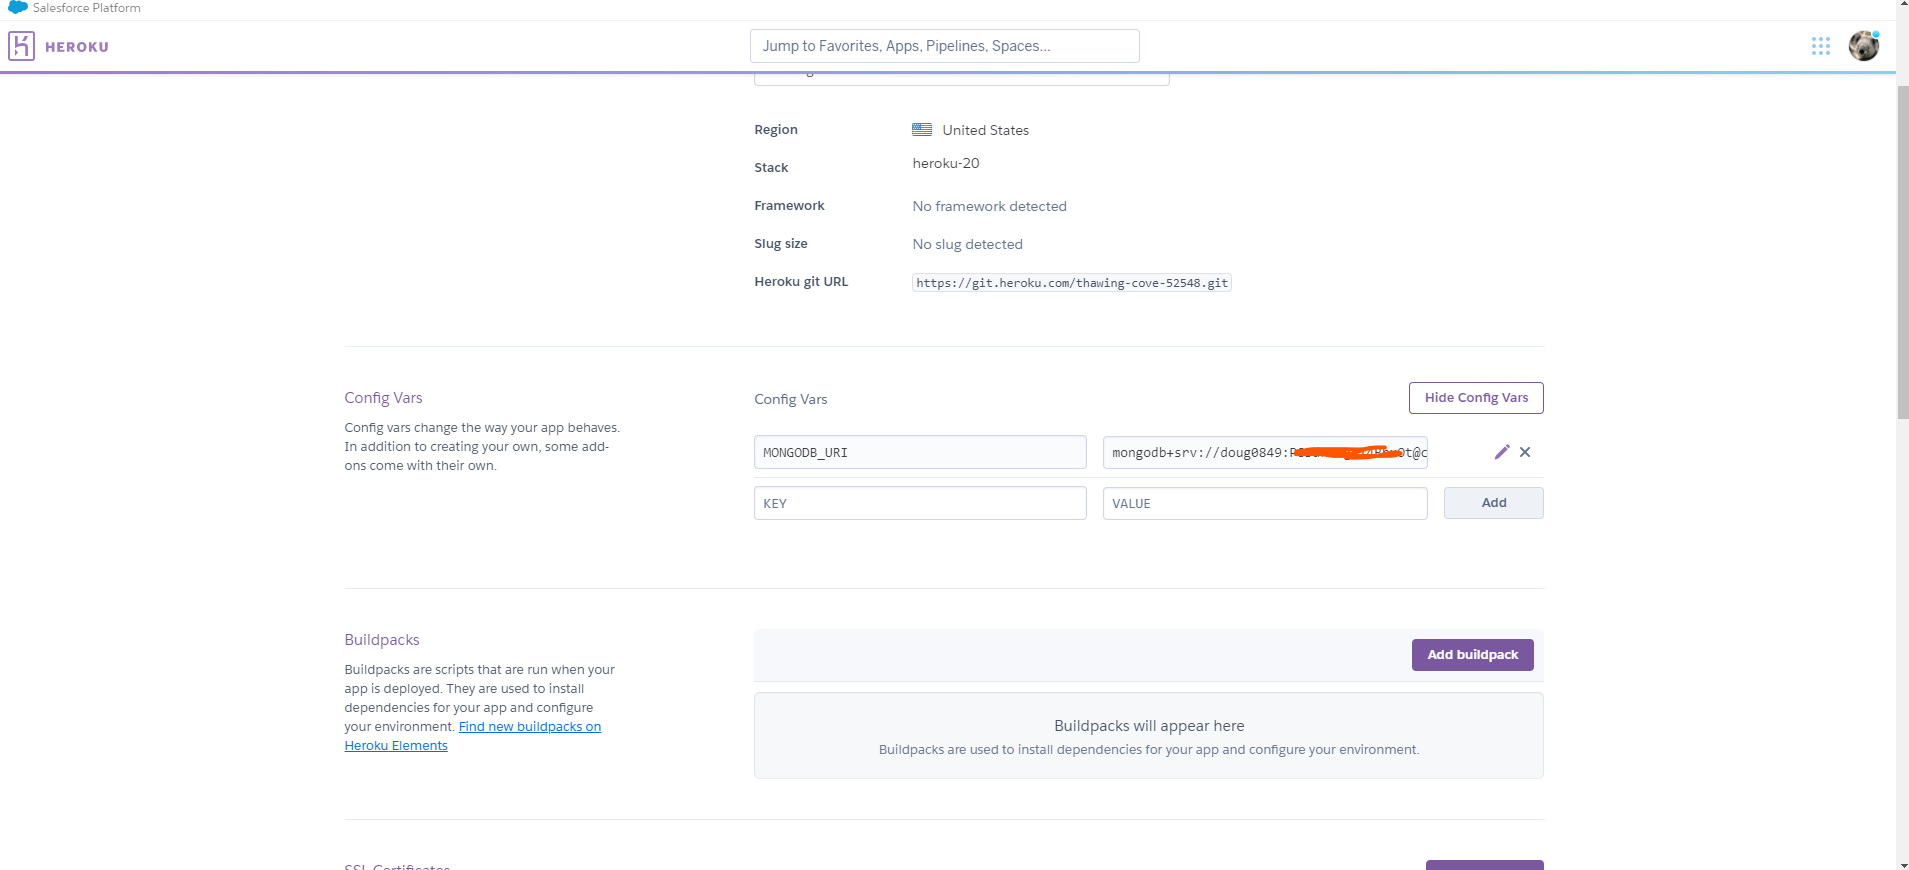
建立完後,到官網登入帳號,設定config Vers 環境變數,建立一個MONGODB_URI的連線變數
接著回到程式的部分,要修改連線的參數及建立新的檔案
先建立一個Procfile,然後寫下web: node app.js,意思是這是一個網站,使用node 來啟動app.js,這樣Heroku才知道怎麼啟動網頁修改參數第一個app.js
1
2const PORT = process.env.PORT || 3000
})process.env.PORT是由heroku自動把PORT的參數注入到我們Node.js執行環境中
改寫config > mongoose.js
1
2
3
4
5
6
7
8
9
10
11
12
13
14
15const mongoose = require('mongoose')
const MONGODB_URI = process.env.MONGODB_URI || 'mongodb://localhost/expenses' // 添加變數
mongoose.connect(MONGODB_URI) // 替換成變數
const db = mongoose.connection
db.on( 'error', () => {
console.log('mongodb error')
})
db.once('open', () => {
console.log('mongodb connected')
})
module.exports = db
額外練習嘗試第二日記錄:
今天大致攻克很多的問題,也自己實驗了很多新做法,都是以前沒嘗試過了,光是是操控伺服器,添加新的元素到陣列裡,就搞了老半天,又學會配合使用cookies做登入狀態的驗證,以及登出刪除cookies,還有使用靜態的js來檢查cookies,來切換登入或登出HTML元素的隱藏或出現,都是以前沒碰過了,也是頭昏腦脹了一天。
新學習項目
- 使用 model.updateOne({key : value}, {$addToSet : {array: element}}) 來插入資料到document的陣列裡面
- 使用res.cookie(‘key’,’value’) 來設定cookie
- 使用res.clearCookie(‘key’),來刪除cookie
- 靜態js可以使用document.cookie來查看全部cookie字串